· Liora Benning · Baking, Kitchen Appliances, Home Cooking · 21 min read
Can I Bake Bread In Convection Toaster Oven
Bake Bread in Convection Toaster Oven: Your Guide
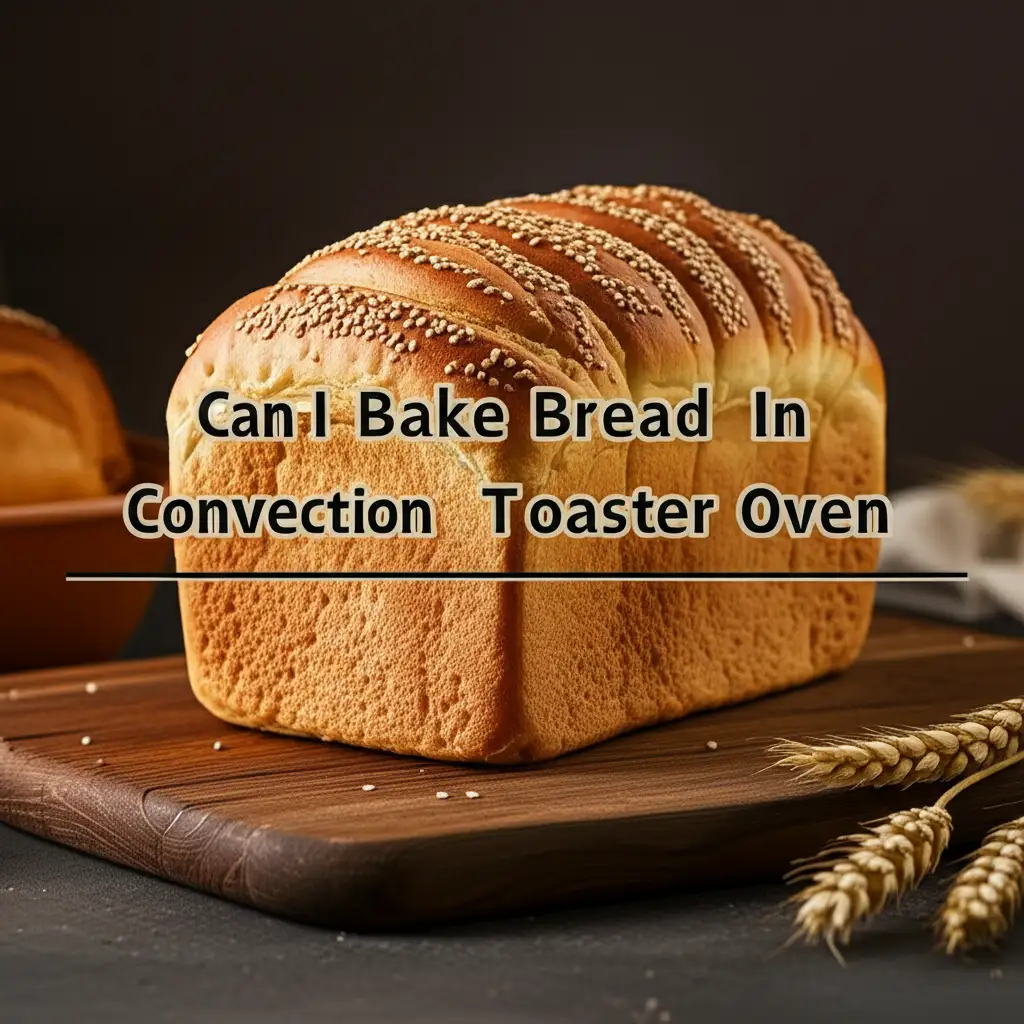
The smell of freshly baked bread fills any home with warmth and comfort. Many people dream of baking their own loaves. They wonder if a small appliance can handle such a task. A common question arises: “Can I bake bread in a convection toaster oven?” This guide answers that question. It offers a clear path to successful bread baking. I will share everything you need to know. We will cover the specific advantages of convection. We will also look at how to get that perfect crust and tender crumb.
This article shows you how to turn your compact appliance into a bread-making powerhouse. We discuss dough preparation, essential tools, and precise baking techniques. You will learn how to troubleshoot common issues. You will also discover great recipes for small batches. By the end, you will feel ready to start your own bread baking journey. Get ready to enjoy delicious homemade loaves.
Takeaway
- Yes, you can bake bread in a convection toaster oven. This appliance is highly capable.
- Convection significantly improves bread baking. It provides even heat distribution.
- Adjust temperatures and times for best results. Convection cooks faster than traditional ovens.
- Proper dough preparation is crucial. Pay attention to proofing and size.
- Preheating is essential for a great crust. Always preheat your oven.
- Experiment with small loaves and quick breads. These are ideal for toaster ovens.
Can I bake bread in a convection toaster oven?
Yes, you absolutely can bake bread in a convection toaster oven. These compact appliances offer excellent capabilities for baking. The convection feature uses a fan to circulate hot air. This creates a more even cooking environment. It helps bread bake faster and more uniformly. You can achieve a beautiful crust and a well-cooked interior.
Understanding Your Convection Toaster Oven for Bread Baking
A convection toaster oven is more than just a regular toaster. It has a fan inside that moves hot air. This fan ensures heat reaches every part of your bread. Understanding how this works is key to baking success. I have found this feature truly transforms baking.
Traditional ovens have hot spots and cool spots. Convection ovens do not have this problem. The circulating air makes the temperature consistent throughout. This means your bread bakes evenly from all sides. You will not find one side burnt and the other undercooked.
The moving air also helps to create a drier atmosphere. This is great for bread. It promotes a quicker browning on the crust. It also helps the crust become crispier. This is why many professional bakers love convection. My own experience confirms these benefits.
Convection helps with heat transfer. It means your bread bakes faster. You might need to adjust your usual recipe times. Often, reducing the baking temperature by 25°F (15°C) is a good starting point. You may also shorten the total baking time. Always keep an eye on your bread. Every oven behaves a bit differently.
Many people wonder about heat distribution. In a convection toaster oven, heat surrounds the dough. This promotes a consistent rise. It also ensures the interior cooks fully. This leads to a perfectly baked loaf every time. Your bread will have a great texture.
The compact size of a toaster oven is also a benefit. It preheats much faster than a full-size oven. This saves energy and time. It is perfect for small batches of bread. You do not need to heat a huge space for a single loaf. I appreciate this efficiency in my kitchen.
Using your convection toaster oven for bread is smart. It gives you professional baking results. It does so in a small, efficient package. You can truly enjoy homemade bread more often.
Benefits of Convection for Bread
Convection baking offers distinct advantages for bread. These benefits improve the final product significantly. I have seen the difference firsthand. Understanding these points helps you bake better bread.
- Even Baking: The fan distributes heat uniformly. This prevents hot spots. Your bread will bake evenly on all sides. It means no more unevenly browned crusts.
- Crispier Crust: The circulating air helps to dry the surface of the dough. This promotes rapid browning. It results in a crispier and more appealing crust. A good crust adds so much to the bread.
- Faster Baking: Convection ovens transfer heat more efficiently. This reduces baking time. Your bread will be ready sooner. This is a great feature when you are hungry.
- Better Rise: Consistent heat allows the bread to rise uniformly. This contributes to a good crumb structure. It also leads to a more professional-looking loaf.
These advantages make convection toaster ovens ideal for bread. They help you achieve excellent results. You get consistent quality with every loaf. This makes baking bread a rewarding experience.
Preparing Your Dough for a Toaster Oven
Proper dough preparation is essential for successful bread baking in a small oven. The size of your dough matters greatly. You cannot fit a large loaf into a toaster oven. I always plan my dough size carefully.
You need to scale your recipe down. Most toaster ovens can hold a small loaf. A good rule of thumb is a loaf that weighs between 1 and 1.5 pounds. This ensures it fits comfortably. It also allows for proper heat circulation.
Dough consistency is also important. For toaster ovens, a slightly stiffer dough works well. This helps the loaf hold its shape better. A very wet dough might spread too much. This could lead to a flat loaf.
Proofing your dough is a critical step. This is when the yeast creates gas, making the dough rise. In a small space like a toaster oven, over-proofing can be a problem. Your dough might rise too much and then collapse. Keep an eye on it.
I usually do the final proofing right in the baking pan. This prevents handling the dough too much. Less handling means less risk of deflating the air bubbles. This is important for a light and airy crumb.
Consider the type of bread you are making. Artisan loaves often need high heat and steam. You can replicate this partially in a toaster oven. Quick breads and enriched doughs also do very well. Sourdough can be trickier but is certainly possible. For making various types of dough, you might also find insights on different bread-making processes useful, even those designed for other machines like how to make sourdough bread in a Panasonic bread maker.
You should always lightly oil your baking pan. This prevents sticking. Dusting with flour also helps create a nice crust. These small steps make a big difference. They ensure your loaf comes out perfectly.
Adjusting Dough Size for Small Ovens
Adjusting dough size is a key step for toaster oven baking. A standard bread recipe often makes a loaf too big. You must reduce the amount of dough. I find this simple adjustment crucial for good results.
Start by cutting your recipe in half or even by two-thirds. This makes a smaller loaf. A smaller loaf fits in your toaster oven. It also bakes more evenly. You want the dough to have space around it.
Measure your toaster oven’s internal space. Find a baking pan that fits with room to spare. Then, shape your dough to match that pan size. A 6x3 inch or 7x4 inch pan is often ideal. Some even use small cast iron Dutch ovens if they fit.
Remember that dough expands when it bakes. Leave at least an inch of clearance on all sides. This prevents the dough from touching the heating elements. Contact with elements can cause burning. This is a common issue I have seen.
Smaller loaves also bake faster. This means less time in the oven. It uses less energy too. This makes toaster oven baking efficient. You can have fresh bread without much fuss.
Essential Tools and Setup for Toaster Oven Bread
Having the right tools makes bread baking easier in a convection toaster oven. You do not need many specialized items. Basic kitchen essentials work perfectly. I have built my setup over time.
First, you need a suitable baking pan. Standard loaf pans are often too large. Look for smaller loaf pans, usually 6x3 inches or 7x4 inches. Some people even use small cast iron Dutch ovens if they fit inside. Measure your oven’s interior before buying.
Parchment paper is a great friend to bakers. It prevents sticking. It also makes cleanup very easy. Line your baking pan with it. This ensures your beautiful loaf slides out without trouble.
A small oven thermometer is highly recommended. Toaster oven temperatures can vary. They might not be as accurate as larger ovens. A thermometer gives you the true temperature. This helps you bake consistently. Many times, an oven might run too hot, leading to issues. If you notice your oven is too hot troubleshooting general oven temperature problems can provide helpful insights, even for smaller units.
You might also consider a shallow pan for water. Placing this pan in the oven can create steam. Steam helps bread develop a crispier crust and better oven spring. Just be careful when adding water to a hot oven.
A cooling rack is also important. Once your bread finishes baking, move it to a rack. This allows air to circulate around the loaf. It prevents the bottom from becoming soggy. Your crust will stay crisp.
For handling hot bread, oven mitts are a must. Choose ones that offer good heat protection. Your safety is always important. I always double-check my mitts before starting.
Finally, a sharp serrated knife is excellent for slicing. Wait for the bread to cool before cutting. Slicing warm bread can lead to a gummy texture. Patience is a virtue here.
These simple tools will set you up for success. They make the process smooth and enjoyable. You will be able to bake delicious bread consistently.
Using Water for Steam in Small Ovens
Creating steam in a small oven is a useful technique. It helps bread develop a great crust. Steam also allows the dough to expand more before the crust sets. This is often called “oven spring.” I use this method for a chewier crust.
Place a small, oven-safe shallow pan on the bottom rack. This pan should fit without blocking air circulation. It might be a small cast iron skillet or a metal baking tin. Ensure it is heatproof.
When you preheat your oven, let this pan heat up too. Once the oven reaches temperature, carefully add about 1/4 to 1/2 cup of hot water to the hot pan. Be very cautious of the steam. It will be hot and intense.
Close the oven door quickly after adding water. This traps the steam inside. The steam creates a moist environment. This keeps the crust soft during the initial baking phase. It allows the bread to rise fully.
After about 10-15 minutes, the steam will dissipate. This is when the crust starts to set and brown. The steam helps the crust stay pliable longer. This results in a better texture.
You can also spray the inside of the oven with water. Use a clean spray bottle for this. Do it carefully and quickly. Repeat a few times in the first minutes of baking. This also adds steam.
Steam is especially beneficial for rustic loaves. These include sourdough or lean doughs. It helps achieve that desirable crackly crust. Experiment with different amounts of water. Find what works best for your specific oven and bread.
Baking Steps: Temperature, Time, and Techniques
Baking bread in a convection toaster oven requires careful attention to temperature and time. The convection feature changes how heat works. I have learned to adjust my approach.
Start by preheating your oven thoroughly. This is a crucial step. A well-preheated oven ensures immediate oven spring. It also helps create a crisp crust. Do not rush this part. Wait at least 10-15 minutes after the oven signals it is ready.
Generally, you should reduce the temperature by 25°F (15°C) from a conventional oven recipe. If a recipe calls for 400°F (200°C), set your convection toaster oven to 375°F (190°C). Convection cooks faster and more efficiently. This adjustment prevents overbaking or burning.
The baking time will also be shorter. A loaf that takes 30-40 minutes in a conventional oven might finish in 20-30 minutes in a convection toaster oven. Start checking your bread earlier than the recipe suggests. I usually start checking around the 15-minute mark for small loaves.
Monitor your bread’s color. The crust should be golden brown. Use an instant-read thermometer for internal doneness. For most yeast breads, the internal temperature should reach 200-210°F (93-99°C). This ensures the bread is fully cooked.
Rotate your loaf halfway through baking. Even with convection, some ovens might have slight variations. Rotating helps ensure even browning. It also helps prevent one side from becoming too dark.
If the crust browns too quickly, you can cover it. A small piece of aluminum foil loosely tented over the top helps. This allows the inside to cook without burning the outside. This is a useful trick I often use.
When the bread is done, turn off the oven. Leave the bread inside for a few more minutes. This allows residual heat to finish cooking if needed. Then, remove it and let it cool completely on a rack. Following these steps helps you achieve perfect bread every time.
Convection Setting Specifics
Using the convection setting correctly is key for bread. Most convection toaster ovens have a dedicated “convection bake” setting. Always use this for bread. It activates the fan.
Some ovens might have options to turn the fan off. For bread, you want the fan on. The circulating air is what provides the benefits. It ensures even heat and a crisp crust.
Read your oven’s manual for specific instructions. Different models might have slightly different operations. Understanding your specific appliance is very helpful.
If your oven has a “convection roast” setting, avoid using it for bread. This setting often uses higher heat or different fan speeds. It is meant for roasting meats. It can cause bread to cook too quickly on the outside.
Some advanced toaster ovens might have moisture-sensing features. These are rare but can be helpful. They adjust settings to maintain ideal humidity. Most standard models do not have this.
Always remember the 25°F (15°C) temperature reduction rule. Apply this when using convection. It is a general guideline that works well. You might fine-tune it based on your oven.
Do not overcrowd the oven. Air needs to circulate freely around the bread. If you bake multiple small items, leave space between them. This ensures even cooking.
My best advice is to practice. Each oven has its quirks. You will learn how your specific convection toaster oven behaves. Over time, you will instinctively know the right settings.
Troubleshooting Common Bread Baking Issues
Even with a convection toaster oven, you might encounter issues. Do not get discouraged. Most problems have simple solutions. I have dealt with these many times.
One common issue is bread browning too quickly on the outside but staying raw inside. This usually means your oven temperature is too high. Or, your loaf is too large for the heat to penetrate. Reduce your oven temperature by another 10-15°F (5-8°C). Also, tent the loaf with aluminum foil if it starts browning too fast. Ensure your loaf size is appropriate for your toaster oven.
Another problem is dense or heavy bread. This often points to proofing issues. Your dough might be under-proofed or over-proofed. Under-proofed dough does not have enough gas bubbles for a good rise. Over-proofed dough rises too much and then collapses. Pay close attention to your dough’s texture. It should feel airy and light when proofed. It should spring back slowly when poked.
A tough or chewy crust can happen if there is not enough steam. Try adding a small pan of hot water to the oven during the first 10-15 minutes of baking. This helps keep the crust soft for longer, allowing for better expansion. It creates a better texture.
Bread sticking to the pan is frustrating. Always grease your pan thoroughly. Use parchment paper. This creates a non-stick surface. It also makes removing the loaf easy.
Uneven baking can occur even with convection. This might be due to oven hot spots. Try rotating your bread halfway through baking. This helps ensure all sides bake evenly. An oven thermometer can also confirm your oven’s true temperature. If your oven consistently runs too hot or cold, it could be a factor. While this article focuses on toaster ovens, general oven troubleshooting principles often apply to temperature inconsistencies.
Sometimes, the bread does not rise much. This could be old yeast. Or, the water used to activate yeast was too hot or too cold. Check your yeast’s expiration date. Use warm water (105-115°F / 40-46°C).
Keep a baking journal. Note down your oven settings, bake times, and results. This helps you learn and adjust. Troubleshooting becomes easier with data.
Recipes and Ideas for Small-Batch Bread
Baking small-batch bread in your convection toaster oven is a joy. Many recipes adapt well to this appliance. You can enjoy fresh bread without making a huge loaf. I love experimenting with different types.
No-Knead Bread is a fantastic choice. The dough comes together easily. It needs a long fermentation, usually overnight. Then, you can divide it into smaller portions. Bake these portions in your toaster oven. They develop a wonderful crust and open crumb. It is very forgiving.
Quick Breads are also perfect. These use baking powder or baking soda for leavening. They do not require yeast or proofing. Examples include banana bread, zucchini bread, or simple soda bread. You can easily make mini loaves or muffins. These fit well in a toaster oven.
Dinner Rolls or Buns are another great option. You can bake a few at a time. They are perfect for a meal or for sandwiches. Shape them smaller than usual. Give them enough space to rise.
Focaccia is surprisingly good in a toaster oven. Make a small batch of dough. Press it into a small square or round pan that fits. Top with herbs, olives, or cherry tomatoes. The convection setting helps create a crisp base.
Enriched doughs like brioche or challah can also be adapted. Just scale down the recipe. Shape them into small braided loaves or individual buns. These rich breads bake beautifully. They become golden brown and soft.
For traditional yeast bread, start with a simple white or whole wheat loaf. Remember to reduce the overall dough weight. Aim for a maximum of 1.5 pounds of dough. This ensures proper baking.
You can also make savory or sweet swirls. Roll out dough, spread with fillings, and slice into individual portions. These bake quickly. They are excellent for snacks.
Making bread in a toaster oven is about adaptation. Be creative with shapes and sizes. Think small. Enjoy the process of creating fresh, delicious bread right in your kitchen. To learn more about general toaster oven bread baking tips, you might find this article on how to bread toaster oven helpful for broader techniques.
Simple White Loaf Recipe (Toaster Oven Adapted)
Here is a simple white bread recipe, adjusted for your convection toaster oven. This recipe makes one small, delicious loaf. It is a great starting point for beginners. I use this recipe often.
Ingredients:
- 1 cup (240ml) warm water (105-115°F / 40-46°C)
- 1 teaspoon active dry yeast
- 1 tablespoon granulated sugar
- 1 teaspoon salt
- 2 tablespoons olive oil
- 2.5 to 3 cups (300-360g) all-purpose flour
Instructions:
- Activate Yeast: In a medium bowl, combine warm water, sugar, and yeast. Stir gently. Let it sit for 5-10 minutes. It should become foamy. This shows the yeast is active.
- Mix Dough: Add salt and olive oil to the yeast mixture. Stir in 2 cups of flour, one cup at a time. Mix until a shaggy dough forms. Gradually add more flour, a little at a time. Do this until the dough comes together. It should be slightly sticky but manageable.
- Knead: Turn the dough onto a lightly floured surface. Knead for 5-7 minutes. It should become smooth and elastic. The dough should spring back when poked.
- First Rise (Bulk Fermentation): Lightly oil a bowl. Place the dough in the bowl. Turn it once to coat. Cover the bowl with plastic wrap or a damp towel. Let it rise in a warm spot for 1 to 1.5 hours. The dough should double in size.
- Shape Loaf: Gently punch down the risen dough. Turn it onto a lightly floured surface. Shape it into a small loaf that fits your toaster oven pan (e.g., 6x3 or 7x4 inches). Ensure it is compact.
- Second Rise (Proofing): Lightly grease your toaster oven loaf pan. Place the shaped dough inside. Cover loosely with plastic wrap. Let it rise again for 30-45 minutes. It should almost double in size.
- Preheat Oven: While the dough proofs, preheat your convection toaster oven to 375°F (190°C). Allow it to preheat for at least 10-15 minutes. This ensures even heat.
- Bake: Place the pan with the dough in the preheated oven. Bake for 20-30 minutes. Check for doneness at 20 minutes. The crust should be golden brown. The internal temperature should be 200-210°F (93-99°C).
- Cool: Remove the bread from the oven. Immediately transfer it to a wire rack. Let it cool completely before slicing. This can take 1-2 hours. Enjoy your fresh, homemade bread!
Maintaining Your Oven for Optimal Baking
Keeping your convection toaster oven clean and well-maintained is important. A clean oven performs better. It also ensures your bread tastes great. I clean my oven regularly.
Food spills and crumbs can build up. These can burn during baking. This creates smoke and bad odors. It can affect the taste of your bread. It can also be a fire hazard.
Always clean your oven after spills. For routine cleaning, wipe down the interior. Use a damp cloth and mild soap. Avoid harsh chemicals. Some ovens have non-stick coatings.
Removable crumb trays are common. Empty and wash this tray regularly. This prevents crumbs from burning. It keeps the heating elements clear.
The heating elements should be free of debris. Do not spray cleaners directly onto them. If food is stuck, gently scrape it off when the oven is cold.
For deeper cleaning, consult your oven’s manual. Some parts might be dishwasher safe. Others require hand washing. Regular cleaning extends the life of your appliance. It also maintains its efficiency.
A clean oven helps with consistent temperature. It ensures heat circulates properly. This is crucial for convection baking. You get better baking results.
Good maintenance also includes checking the door seal. A tight seal keeps heat inside. If the seal is loose, heat escapes. This affects baking performance.
Proper care means your toaster oven will serve you well for a long time. It will continue to bake delicious bread. It is a small effort with big rewards.
Frequently Asked Questions
Can I bake a full-size loaf of bread in a convection toaster oven?
No, most convection toaster ovens are too small for a full-size loaf. A standard loaf pan is often too long or too wide. You need to scale down your bread recipe. Aim for a loaf that weighs 1 to 1.5 pounds. This size fits well and allows for proper heat circulation.
Do I need to adjust baking recipes for a convection toaster oven?
Yes, you should adjust baking recipes. Convection ovens cook faster and more evenly than conventional ovens. Reduce the baking temperature by about 25°F (15°C). Also, reduce the baking time by 15-25%. Always start checking your bread earlier than the recipe suggests.
What is the best temperature for baking bread in a convection toaster oven?
The best temperature varies by recipe and oven. As a general rule, set your convection toaster oven to 375°F (190°C). This is a good starting point if a recipe calls for 400°F (200°C) in a conventional oven. Always monitor your bread’s browning and use an internal thermometer for doneness.
How does the convection feature affect bread baking results?
The convection feature uses a fan to circulate hot air. This provides even heat distribution. It helps bread bake uniformly, preventing hot spots. It also creates a drier environment. This results in a crisper crust and often faster baking times. Your bread will have a better overall texture.
Can I bake sourdough bread in a convection toaster oven?
Yes, you can bake sourdough bread in a convection toaster oven. You will need to make a small-batch sourdough recipe. Ensure your baking vessel fits. Consider using a small cast iron pot or a covered ceramic baker to create steam. This helps achieve that desirable sourdough crust and crumb.
My bread is burning on top but not fully cooked inside. What should I do?
This indicates the heat is too high or the loaf is too thick. Reduce your oven temperature slightly, perhaps another 10-15°F. If the top still browns too quickly, loosely tent the loaf with aluminum foil. This protects the top while the inside continues to cook.
Conclusion
You can indeed bake bread in a convection toaster oven. This compact appliance is more than capable. It offers many benefits for home bakers. I have shown you how to achieve great results. The convection feature helps create evenly baked loaves with beautiful crusts. You can enjoy the satisfaction of homemade bread.
Remember to adjust your recipes for smaller loaf sizes. Pay attention to proofing and oven
- convection toaster oven
- bake bread
- homemade bread
- toaster oven baking
- bread recipes
- kitchen tips
- small appliance
- baking guide
- perfect crust
- bread proofing


