· Elira Thomsen · Kitchen Maintenance · 16 min read
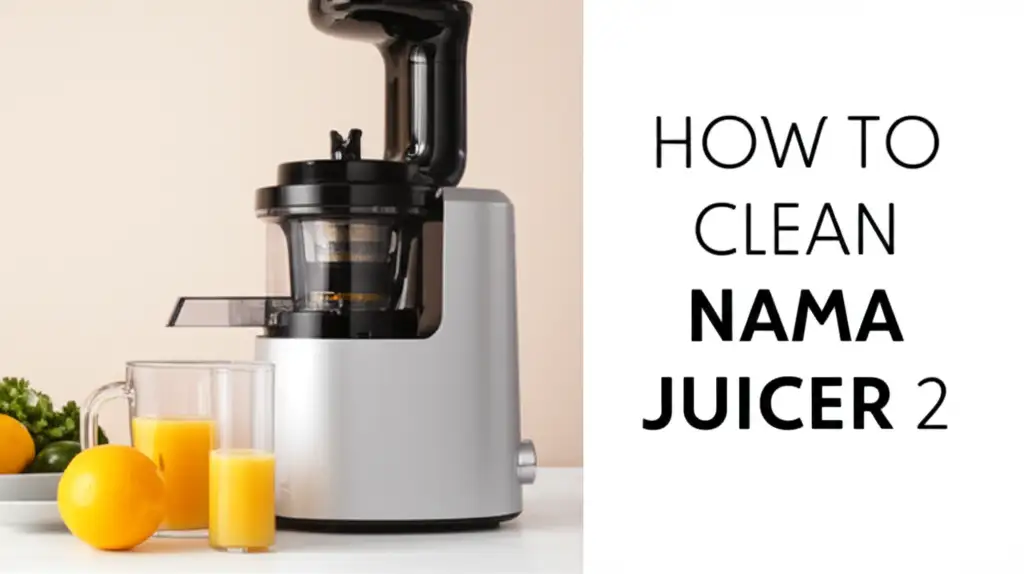
How To Clean Nama Juicer 2
Mastering Nama Juicer 2 Cleaning for Longevity
The sweet taste of fresh juice brightens any morning. Your Nama Juicer 2 makes delicious, nutrient-rich beverages simple to create at home. However, to keep your juicer performing well, regular cleaning is essential. Proper care prevents residue buildup, maintains hygiene, and extends the life of your appliance.
I understand the desire for easy maintenance. Cleaning your Nama Juicer 2 does not need to be a chore. This article guides you through a complete cleaning process. We cover daily routines, deep cleaning methods, and effective solutions for common issues. You will learn how to keep your Nama Juicer 2 in perfect condition.
Takeaway:
- Clean your Nama Juicer 2 immediately after each use.
- Disassemble all removable parts for thorough cleaning.
- Use warm, soapy water and the provided brush for daily care.
- Perform deep cleaning monthly with vinegar or baking soda solutions.
- Ensure all parts dry completely before reassembly.
Properly cleaning your Nama Juicer 2 involves disassembling its components, rinsing them immediately after use with warm water and a brush to remove pulp, then washing with dish soap. For a deeper clean, soak parts in a diluted vinegar or baking soda solution to tackle stubborn residue and prevent odors, ensuring all parts are dry before storing or reassembling.
Understanding Your Nama Juicer 2: Parts and Purpose
Your Nama Juicer 2 is a slow juicer designed for efficient juice extraction. Knowing its individual parts helps you clean it properly. Each component plays a specific role. Understanding these parts makes disassembly and reassembly straightforward.
The main parts include the hopper, pusher, juicing chamber, auger, strainer (fine and coarse), spinning brush, and juice/pulp outlets. The auger slowly presses ingredients. The strainer separates pulp from juice. The spinning brush wipes the strainer clean during operation. Residue can build up in any of these areas, especially the strainer and auger. You must clean each part carefully. Cleaning ensures efficient future juicing and prevents clogs. Knowing what each part does helps you focus your cleaning efforts.
When you disassemble your Nama Juicer 2, you separate these key components. This allows you to access all surfaces that come into contact with fruits and vegetables. For example, the juicing chamber can hold tiny bits of pulp. The auger’s grooves might trap fibers. The strainer, with its tiny holes, is a primary area for residue accumulation. Cleaning these parts individually ensures no food particles are left behind. This prevents bacterial growth and maintains optimal juicing performance. A clean juicer processes ingredients more smoothly.
Proper maintenance of each part means a longer lifespan for your appliance. A well-maintained juicer also provides cleaner, purer juice. Neglecting specific parts can lead to performance issues. You might experience reduced juice yield or even unpleasant odors. My experience shows that a quick check of each part during disassembly helps identify areas needing more attention. This simple step saves time later. I recommend familiarizing yourself with the component names. This makes following cleaning instructions easier. Disassembly is the first step in any cleaning routine. The process of putting a juicer back together is important too. If you are interested in how other juicers are assembled, you can read about how to put Champion juicer together.
Immediate Action: Daily Cleaning Your Nama Juicer 2
Cleaning your Nama Juicer 2 immediately after each use is the best practice. This simple step prevents pulp from drying and sticking to parts. Dried pulp is much harder to remove later. A quick rinse saves you significant scrubbing time. This daily routine keeps your juicer ready for its next use.
I always recommend cleaning as soon as juicing finishes. Start by unplugging the juicer for safety. Then, disassemble all removable parts. Separate the hopper, pusher, juicing chamber, auger, strainer, and spinning brush. Take these parts to your sink. Rinse each part under warm running water. Most of the pulp will wash away easily at this stage. Use the brush provided with your Nama Juicer 2 to scrub the strainer. The strainer’s small holes can trap tiny fibers. The brush helps dislodge these.
After rinsing, wash each component with warm, soapy water. Use a mild dish soap. Scrub all surfaces, paying special attention to grooves and crevices. The auger often has fibers clinging to it. The spinning brush also collects small particles. Ensure you clean both the inside and outside of the juicing chamber. Once clean, rinse all parts again thoroughly under clear water. Make sure no soap residue remains. Soap residue can affect the taste of your next batch of juice.
Finally, allow all parts to air dry completely on a drying rack. You can also dry them with a clean cloth. Do not reassemble the juicer if parts are still wet. Moisture can lead to mold growth or unpleasant odors over time. Keeping your Nama Juicer 2 clean daily ensures it performs at its best. It also maintains good hygiene. This consistent care routine prevents buildup and keeps your juicer operating smoothly for years. This daily routine is similar to how you would clean other juicers. For example, you can learn more about how to clean Breville juicer BJE510XL 2 for similar daily care principles.
Thorough Cleaning: Deep Cleaning Your Nama Juicer 2
While daily cleaning keeps your Nama Juicer 2 in good shape, a deep clean is necessary periodically. I recommend performing a deep clean monthly, or more often if you juice frequently. This process tackles stubborn stains, odors, and hidden residue that daily rinsing might miss. Deep cleaning ensures your juicer remains hygienic and performs optimally. It removes any mineral deposits or food particles that have accumulated over time.
For a deep clean, you will need either white vinegar or baking soda. Both are natural, effective cleaning agents. First, disassemble all removable parts as you would for daily cleaning. Rinse them to remove any immediate pulp. Then, prepare your cleaning solution. If using vinegar, mix equal parts white vinegar and warm water in a sink or large basin. Submerge all the juicer parts into this solution. Allow them to soak for 30 minutes to an hour. Vinegar breaks down mineral deposits and acts as a natural disinfectant. It also helps with odor removal.
If you prefer baking soda, create a paste with baking soda and a small amount of water. Apply this paste directly to any stained areas or persistent residue. Let it sit for 15-20 minutes. For general soaking, you can dissolve a few tablespoons of baking soda in warm water and soak the parts similarly to the vinegar method. Baking soda is effective at absorbing odors and gently scrubbing away grime without scratching surfaces. After soaking, use the provided cleaning brush, or a soft bristled brush, to scrub all parts thoroughly. Pay close attention to the strainer screen. The small holes can harbor stubborn residue. You might also find residue around the auger’s base or within the juicing chamber.
Rinse all components meticulously under warm running water. Ensure no cleaning solution residue remains. Allow the parts to air dry completely before reassembly. This deep cleaning process revitalizes your Nama Juicer 2. It also helps in maintaining its appearance and function. This thorough cleaning also extends the overall lifespan of your valuable appliance. You can also think of deep cleaning in terms of how you clean other parts of your home. For general ideas on using vinegar for cleaning, see where to put vinegar in dishwasher to clean.
Advanced Techniques: Removing Stubborn Stains and Odors
Sometimes, even with regular cleaning, your Nama Juicer 2 might develop stubborn stains or lingering odors. Certain vegetables, like carrots or beets, are notorious for leaving colorful marks. Odors can develop from leftover pulp if the juicer is not dried properly. Using advanced techniques can help eliminate these issues. This ensures your Nama Juicer 2 always looks and smells fresh.
For tough stains, especially from vibrant produce, a lemon can be very effective. Cut a lemon in half. Rub the cut side directly onto the stained plastic parts of your juicer. The natural acidity in the lemon acts as a gentle bleaching agent. Let the lemon juice sit on the stain for 10-15 minutes. Then, scrub with a soft cloth or brush and rinse thoroughly. You can also make a paste with baking soda and lemon juice for an even stronger stain remover. Apply the paste, let it sit, then scrub and rinse. This method is safe for your juicer parts and avoids harsh chemicals. Speaking of carrots, if you are curious about juicing them, you might find information on can masticating juicer juice carrots 2 interesting.
Lingering odors often come from mold or fermentation of tiny food particles. White vinegar is an excellent deodorizer. After cleaning the parts, soak them in a solution of equal parts white vinegar and warm water for about an hour. The vinegar neutralizes odors effectively. For particularly strong smells, you can add a few drops of tea tree oil to the soaking solution. Tea tree oil has natural antimicrobial properties. After soaking, rinse all parts very well under running water. Ensure no vinegar smell remains.
Another trick for persistent odors is using activated charcoal. Place a few pieces of activated charcoal near the disassembled, dry juicer parts overnight. Charcoal absorbs odors from the air. Make sure your juicer parts are completely dry before using this method. Proper drying is crucial to prevent odors from forming in the first place. Always allow parts to air dry completely or wipe them down before storage. These advanced techniques help you maintain a spotless and fresh-smelling Nama Juicer 2. They ensure your juicing experience remains pleasant.
Preventative Measures: Keeping Your Nama Juicer 2 Pristine
Taking preventative measures can significantly reduce the effort needed for cleaning your Nama Juicer 2. Prevention is always easier than cure when it comes to appliance maintenance. These simple habits keep your juicer from accumulating stubborn residue or developing odors in the first place. You will enjoy a consistently clean juicer with less hassle.
One key preventative step is to rinse your juicer parts immediately after use. This cannot be stressed enough. If you cannot do a full wash right away, at least rinse the parts under running water. This washes away most of the wet pulp before it has a chance to dry and stick. Dried pulp is the primary source of cleaning difficulty. A quick rinse takes only a minute or two but saves you much more time later. I make it a habit to do this before I even drink my juice. It keeps the cleaning simple.
Another important measure is to use enough water when juicing certain produce. Juicing leafy greens or very fibrous vegetables can leave more residue. Following these items with a piece of high-water content fruit like an apple or cucumber can help flush out the system. You can also pour a small glass of water through the juicer towards the end of your juicing session. This helps push out any remaining pulp and cleans the internal components slightly. It prepares the juicer for easier disassembly and cleaning.
Always ensure your juicer parts are completely dry before storage or reassembly. Moisture is the biggest enemy when it comes to mold and bacterial growth. After washing, I lay all my Nama Juicer 2 parts on a clean towel or drying rack. I let them air dry for several hours, or even overnight. You can also use a clean cloth to wipe them dry. Never store wet or damp juicer parts. This habit prevents the development of mildew or unpleasant, stale odors. Consistent prevention helps maintain the hygiene and performance of your Nama Juicer 2. It ensures a positive juicing experience every time. This proactive approach saves time and effort in the long run. Proper drying practices are essential for all kitchen appliances.
Reassembly Readiness: Putting Your Nama Juicer 2 Back Together
After diligently cleaning all the parts of your Nama Juicer 2, the next crucial step is reassembly. Correct reassembly ensures your juicer functions safely and efficiently. It also prevents leaks or damage during operation. I find it helpful to have all parts laid out and completely dry before I start. This makes the process smooth and quick.
First, ensure the main juicing chamber is clean and dry. Place it onto the motor base, making sure it clicks securely into place. You should hear a distinct click, or feel it lock, indicating proper alignment. Next, insert the strainer. The Nama Juicer 2 comes with both fine and coarse strainers. Choose the one suitable for your next juicing task. Place the chosen strainer inside the juicing chamber. Ensure it sits flush and properly aligned with the base.
Then, position the spinning brush assembly around the strainer. This component helps sweep pulp from the strainer during juicing. It should fit snugly around the outside of the strainer. Following this, carefully insert the auger into the center of the strainer. The auger’s bottom part should fit into the drive shaft on the motor base. You might need to rotate the auger slightly until it drops into place. It should sit securely and not wobble.
Finally, place the hopper and lid assembly onto the top of the juicing chamber. Align the markers on the lid with those on the chamber and twist to lock it into position. Ensure the lid is fully secured before operating the juicer. If the lid is not properly locked, the juicer will not start due to safety features. Always double-check all connections. A properly reassembled Nama Juicer 2 is ready for its next juicing session. This organized approach to reassembly saves time and prevents frustration. It also makes sure your juicer performs as expected. Getting your juicer back together correctly is as important as cleaning it. If you need a refresher on juicer assembly in general, there are guides available on how to wash Hurom juicer that touch upon similar reassembly concepts.
Extending Lifespan: Long-Term Care for Your Nama Juicer 2
Beyond daily and deep cleaning, a few long-term care practices can significantly extend the lifespan of your Nama Juicer 2. These simple habits protect your investment and ensure years of fresh juice. Thinking about the long-term helps you avoid common pitfalls that can shorten an appliance’s life. I believe in proactive care to get the most out of my kitchen tools.
One important aspect of long-term care is proper storage. When your Nama Juicer 2 is not in use, store it in a cool, dry place. Avoid direct sunlight or extreme temperature fluctuations. These conditions can degrade plastic parts over time. If you have limited counter space, disassemble the juicer and store its parts in a cabinet. Make sure they are completely dry first. Keeping the juicer clean and dry in storage prevents dust accumulation and potential mildew. It also keeps parts from warping or becoming brittle. A dedicated storage spot helps protect your appliance from accidental damage.
Another crucial tip is to avoid using harsh chemicals or abrasive cleaning tools. Steel wool pads, scouring powders, or strong chemical cleaners can scratch the plastic parts of your juicer. These scratches can then harbor bacteria or become discolored. Stick to the provided cleaning brush, soft cloths, and mild dish soap. For deep cleaning, rely on natural solutions like vinegar or baking soda. These are gentle yet effective. They preserve the integrity and appearance of your Nama Juicer 2’s components. Using the correct tools prevents wear and tear.
Regularly inspect your juicer for any signs of wear or damage. Check the silicone seals and gaskets for cracks or tears. These seals are vital for preventing leaks during juicing. If you notice any damage, contact Nama support for replacement parts. A small crack in a seal can lead to a messy juicing experience. Also, ensure the motor base stays dry and clean. Never submerge the motor base in water. Wipe it with a damp cloth if needed. These careful steps ensure your Nama Juicer 2 remains a reliable partner in your healthy lifestyle for many years. It is about consistent attention to detail.
FAQ Section
How often should I clean my Nama Juicer 2?
You should clean your Nama Juicer 2 immediately after every use. This daily routine prevents pulp from drying and sticking to the parts. Perform a thorough deep clean once a month. This tackles any stubborn residue, mineral buildup, or lingering odors. Consistent cleaning maintains performance and hygiene.
Can I put Nama Juicer 2 parts in the dishwasher?
While some juicer parts might be labeled dishwasher-safe, it is generally recommended to hand wash your Nama Juicer 2 components. The high heat and harsh detergents in dishwashers can degrade plastic and silicone parts over time. Hand washing ensures a gentler clean and prolongs the life of your juicer’s parts.
What if my Nama Juicer 2 smells after cleaning?
If your Nama Juicer 2 still smells after cleaning, it usually means some food particles or residue remain, or the parts were not dried completely. Re-clean the parts, focusing on hard-to-reach areas like the strainer and auger. Soak them in a solution of equal parts white vinegar and warm water for an hour. Ensure all parts are completely dry before reassembling.
How do I remove orange stains from my Nama Juicer 2?
Orange stains, often from carrots or turmeric, can be tough. Try rubbing a cut lemon directly onto the stained plastic parts. The citric acid helps break down the pigments. You can also make a paste with baking soda and a small amount of water, apply it to the stain, let it sit for 15-20 minutes, then scrub and rinse thoroughly.
Are there special cleaning tools for Nama Juicer 2?
Your Nama Juicer 2 comes with a specialized cleaning brush. This brush is designed to effectively clean the fine mesh of the strainer and other small crevices. Use this brush regularly for daily cleaning. For deep cleaning, a soft-bristled brush or an old toothbrush can also be helpful for reaching tight spots.
Conclusion
Maintaining a clean Nama Juicer 2 is straightforward and rewarding. Regular cleaning ensures your juicer operates efficiently and hygienically. By following the simple steps outlined, you prevent residue buildup, eliminate odors, and extend the life of your valuable appliance. I have shown you how daily rinsing and periodic deep cleaning keep your juicer in top condition.
Remember to disassemble parts immediately after juicing for an easy rinse. Use warm, soapy water and the provided brush for daily care. For a deeper clean, rely on natural solutions like vinegar or baking soda. These agents effectively tackle stubborn stains and odors. Always ensure all components are completely dry before reassembling. This prevents moisture issues like mold growth. Your Nama Juicer 2 is a durable machine, but consistent, gentle care is key to its longevity.
Embrace these cleaning habits. They will enhance your juicing experience. A well-maintained Nama Juicer 2 provides fresh, pure juice every time. Keep your Nama Juicer 2 sparkling clean, and it will serve you well for many healthy years to come. Enjoy the delicious benefits of a pristine juicer, making your healthy lifestyle simpler and more delightful.
- Nama juicer cleaning
- juicer maintenance
- slow juicer care
- Nama J2 cleaning tips
- juicer hygiene

Elira Thomsen
Home Organization & DIY Living Expert
I'm Elira Thomsen, a lifelong enthusiast of clean, beautiful, and functional homes. With over a decade of hands-on experience in DIY home decor, smart cleaning solutions, and practical organization, I help everyday homeowners turn clutter into calm. Whether it's transforming a neglected nook into a cozy reading spot, mastering budget-friendly storage hacks, or refreshing a space with seasonal décor, I'm here to guide you every step of the way. My mission is simple — make home care easier, more inspiring, and truly rewarding.