· Tessa Winslow · Kitchen Plumbing · 20 min read
How To Connect Dishwasher Drain To Garbage Disposal
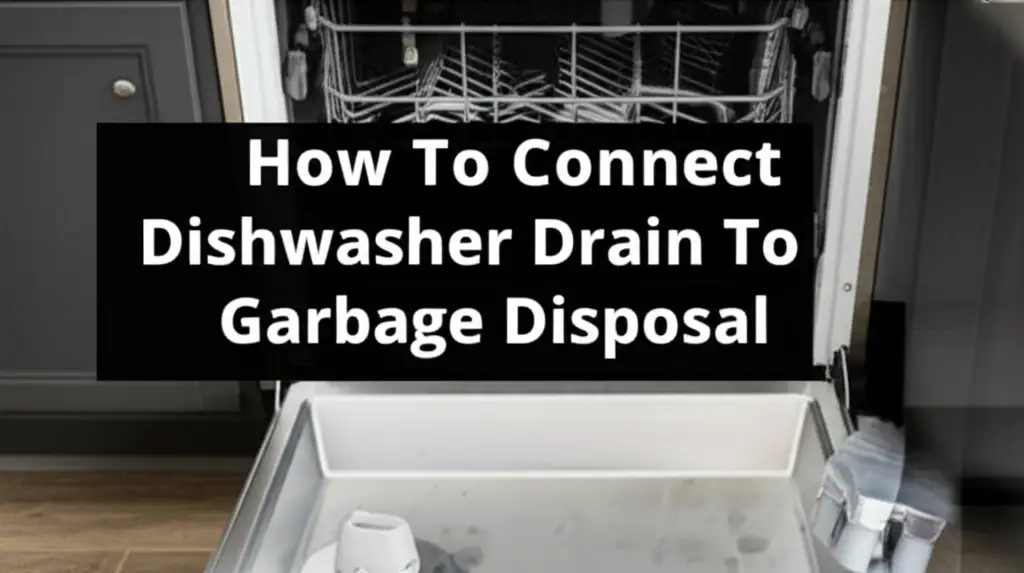
Effortlessly Connect Your Dishwasher Drain to Garbage Disposal
Your kitchen functions better when everything works in harmony. A vital part of this harmony is ensuring your dishwasher drains correctly. When you install a new dishwasher or replace an old garbage disposal, understanding how to connect dishwasher drain to garbage disposal becomes essential. This connection allows your dishwasher to efficiently dispose of dirty water, keeping your dishes sparkling clean.
Many homeowners find kitchen plumbing daunting. However, connecting your dishwasher drain to your garbage disposal is a manageable DIY task. I will walk you through each step. This guide covers everything from gathering tools to testing your new connection. You will gain confidence in your ability to tackle this common home improvement project. Let’s get your kitchen plumbing running smoothly.
Takeaway
Connecting a dishwasher drain to a garbage disposal involves a few clear steps. Here is what you need to remember:
- Always turn off power before starting any work.
- Locate and remove the knockout plug from the disposal’s dishwasher inlet.
- Secure the drain hose with a hose clamp.
- Create a high loop in the drain hose to prevent backflow.
- Test the connection for leaks before final use.
Connecting a dishwasher drain to a garbage disposal involves preparing the disposal by removing its knockout plug, securing the dishwasher drain hose to the disposal’s inlet port with a hose clamp, and then creating a high loop in the drain hose to prevent drain water backflow into the dishwasher.
Gathering Your Tools and Materials for a Smooth Connection
Before you begin connecting your dishwasher drain to your garbage disposal, preparation is key. Having all your tools and materials ready saves time and frustration. It helps you complete the job efficiently and safely. I always gather everything first. This approach ensures you do not stop midway through the process.
This section covers the essential items you will need for this plumbing task. Most of these tools are standard household items. Others are inexpensive and easily found at any hardware store. We will look at both the tools you will use and the specific materials required. Getting organized now makes the entire connection process much simpler.
Essential Tools for the Job
You need basic tools to handle this connection properly. These tools help you access parts and secure connections. A good set of tools makes the task easier and safer. Do not attempt this project without them.
Here are the tools you will need:
- Screwdriver: Both Phillips and flathead screwdrivers are useful. You will use them for hose clamps and panel access.
- Pliers: Adjustable pliers or channel locks work well. They help tighten fittings.
- Hammer: A small hammer is needed to knock out the plug from the garbage disposal.
- Punch or Hex Wrench: You need this to tap out the knockout plug. A hex wrench often works perfectly for this.
- Bucket or Towels: Keep these ready to catch any residual water. Plumbing jobs can get messy.
- Safety Glasses: Protect your eyes from debris or splashing water. This is a very important safety measure.
Necessary Materials for a Secure Connection
Beyond tools, you need a few specific materials. These materials ensure a watertight and durable connection. Do not skip any of these items. They are crucial for preventing leaks and future problems.
Here are the materials to acquire:
- Dishwasher Drain Hose: Your dishwasher likely comes with one. If not, purchase a ribbed plastic drain hose.
- Hose Clamp: This metal clamp secures the drain hose to the garbage disposal. It prevents leaks at the connection point. Often, one comes with the disposal or dishwasher.
- Zip Ties or Plumber’s Tape: These are for creating the high loop. Zip ties are often simpler to use. Plumber’s tape can provide an extra seal if needed, but usually not for the drain hose connection itself.
- Gloves: Protect your hands from grime and potential sharp edges.
Gathering these items ensures you are fully prepared. Now, you can move on to the actual work with confidence. This preparation phase is quick but very important.
Safety First: Preparing for the Dishwasher Connection
Safety is paramount when working with appliances and plumbing. Before you even think about touching the dishwasher or garbage disposal, you must take necessary precautions. Ignoring these steps can lead to electrical shock or water damage. I always prioritize safety. It protects both you and your home.
This section details the critical safety measures you must take. We will cover disconnecting power and preparing your workspace. These steps create a safe environment for your plumbing project. Do not rush through this part. Proper preparation ensures a smooth and hazard-free installation.
Disconnecting Power to the Appliances
Working with electrical appliances near water sources is dangerous without cutting power. You must ensure no electricity flows to either your dishwasher or your garbage disposal. This prevents accidental shocks. I always double-check this step. It is the most important safety precaution.
Follow these steps to disconnect power:
- Locate the Breaker Box: This is usually in your basement, garage, or utility closet.
- Identify the Correct Breaker: Look for labels like “Dishwasher,” “Disposal,” or “Kitchen Appliances.” If not labeled, you might need to flip breakers one by one. Turn off the main breaker if you are unsure.
- Flip the Breaker to OFF: This cuts power to the circuit.
- Test the Outlets: Plug a small lamp or use a voltage tester in the outlets under the sink. Confirm there is no power. Also, try turning on the dishwasher and disposal to ensure they do not power on.
Once the power is off, you can work without fear of electrical hazards. This simple step protects you significantly. Never skip it.
Clearing and Preparing the Work Area
A clear and organized workspace reduces accidents and makes the job easier. You will be working under your kitchen sink. This area can often be cluttered. Removing items gives you enough room to move and see what you are doing. I always clear the area completely. It makes finding tools and parts much simpler.
Prepare your work area with these actions:
- Empty Under the Sink: Remove all cleaning supplies, trash cans, and any other items stored there. This gives you unobstructed access.
- Place Towels or a Bucket: Put old towels or a bucket directly under the garbage disposal. This catches any water that might spill during the process. There is always some residual water in plumbing lines.
- Ensure Good Lighting: Use a flashlight or headlamp if the under-sink area is dim. You need to see clearly to make precise connections.
- Wear Gloves and Safety Glasses: As mentioned before, these protect your hands and eyes from grime, sharp edges, and potential splashes.
With power disconnected and your workspace prepared, you are ready for the hands-on part of the connection. These foundational steps ensure a safe and efficient installation.
Locating and Preparing the Dishwasher Drain Inlet on the Disposal
The garbage disposal has a specific inlet for the dishwasher drain hose. This port is crucial for the connection. However, disposals come with a “knockout plug” inside this port. This plug prevents water from leaking out if you are not connecting a dishwasher. You must remove this plug before connecting your dishwasher. Many people forget this step. It leads to frustration later when the dishwasher does not drain. I have seen this mistake many times.
This section guides you through finding this inlet and properly removing the knockout plug. Doing this correctly ensures your dishwasher drains efficiently into the disposal. A blocked port means your dishwasher water will just sit in the tub.
Finding the Knockout Plug
Every garbage disposal designed for a dishwasher connection has this specific port. It is usually a small, stubby pipe extending from the side of the disposal unit. It is typically located higher up on the side, near the top of the disposal. You will usually find it on the upper part of the disposal body, not near the bottom where the main drain pipe attaches.
Here is how to locate it:
- Look for a Small Port: Inspect the side of your garbage disposal. You are looking for a small, cylindrical port. It is about 3/4 to 1 inch in diameter. This is where the dishwasher drain hose connects.
- Identify the Knockout: Inside this port, you will see a plastic or metal plug. This is the knockout plug. It seals the port until a dishwasher is connected. It will be flush with the opening, or just slightly recessed.
It is important to remember this plug is inside the disposal. You cannot simply pull it out. It must be “knocked out” into the disposal chamber. This is a common point of confusion for DIYers.
Removing the Knockout Plug Safely
Removing the knockout plug requires a bit of force. You must ensure the plug falls into the disposal chamber. Then, you remove it from inside the disposal. Forgetting to remove the plug from the disposal chamber causes significant drainage issues. Your dishwasher will not drain at all if the plug blocks the path.
Follow these steps to remove the plug:
- Insert a Punch or Hex Wrench: Take a screwdriver, punch, or hex wrench. Insert it into the knockout port. It should fit snugly.
- Tap with a Hammer: With your hammer, tap the end of the punch or wrench firmly. You need to apply enough force to break the plug loose. You will hear a distinct sound when the plug dislodges and falls into the disposal chamber. It might take a few taps.
- Retrieve the Plug: Open the top of the garbage disposal. This is the drain opening in your sink. Reach into the disposal chamber. Carefully retrieve the knockout plug. It is crucial to remove this piece. If left inside, it can damage the disposal motor or block the drain.
- Inspect the Port: Once the plug is out, check the port. Ensure it is clear and ready for the drain hose. There should be no jagged edges.
Now that the knockout plug is removed, your garbage disposal is ready to receive the dishwasher drain hose. This step is critical for proper drainage and often overlooked.
Connecting the Dishwasher Drain Hose
With the knockout plug removed, you are ready to make the main connection. The dishwasher drain hose carries dirty water from your dishwasher to the garbage disposal. A secure connection here prevents leaks and ensures efficient drainage. This step involves attaching the hose and creating a vital component called the “high loop.” I pay close attention to this part. It prevents standing water and backflow issues.
This section guides you through attaching the drain hose. We will also discuss the importance of the high loop. Proper installation of both ensures your dishwasher performs optimally.
Securing the Dishwasher Drain Hose
Connecting the drain hose is straightforward. You will use a hose clamp to create a tight seal. A secure connection stops leaks under your sink. This is a common area for water damage if the connection is loose.
Follow these steps to secure the hose:
- Slide on the Hose Clamp: Take the hose clamp. Slide it over the end of the dishwasher drain hose. Make sure it is positioned far enough back to allow the hose to fully seat on the disposal port.
- Attach the Drain Hose: Push the end of the dishwasher drain hose onto the disposal’s dishwasher inlet port. This is the port where you just removed the knockout plug. Push the hose on as far as it will go. It should fit snugly.
- Position the Clamp: Slide the hose clamp forward. Position it over the connection point. It should sit directly over the ridged area of the disposal port where the hose is attached.
- Tighten the Clamp: Use your screwdriver to tighten the hose clamp. Turn the screw until the clamp feels secure and tight around the hose. Do not overtighten, as this can damage the hose. The connection should be firm but not excessively squeezed. Wiggle the hose gently to ensure it does not slip off.
A properly secured hose clamp makes all the difference. It provides the necessary seal for a leak-free connection. This simple step prevents major headaches later.
Ensuring a High Loop in the Drain Hose
The “high loop” is a critical, often misunderstood part of dishwasher installation. This U-shaped bend in the drain hose prevents dirty water from the sink or disposal from flowing back into your clean dishwasher. It also acts as an air gap. This air gap stops sink odors from entering the dishwasher. Without a high loop, nasty water could contaminate your clean dishes. I always emphasize this step. It protects your family’s health and ensures proper sanitation.
Here is how to create a high loop:
- Route the Hose Upwards: After connecting the drain hose to the garbage disposal, route the hose upwards. It needs to go as high as possible under the sink cabinet. Aim for a point at or just below the countertop.
- Form the Loop: Create a U-shape with the hose. The highest point of this U should be above the disposal’s drain inlet. This ensures gravity helps pull water out of the dishwasher and prevents backflow.
- Secure the Loop: Use a zip tie, plumber’s tape, or a hose strap. Secure the highest point of the loop to the underside of the countertop or the side of the sink cabinet. This holds the loop in place permanently. Ensure it is tight enough to keep the loop formed. Do not kink the hose. The hose should still allow water to flow freely.
The high loop is a small detail with a big impact. It ensures your dishwasher operates hygienically and efficiently. Your dishes will be cleaner and safer as a result.
Testing Your New Dishwasher Drain Connection
After making all connections, testing is the next critical step. You need to confirm that everything drains properly and that there are no leaks. Skipping this step can lead to significant water damage if a connection is loose. I never bypass the testing phase. It gives me peace of mind.
This section guides you through the process of testing your newly installed dishwasher drain connection. We will cover the initial water test and observing for any leaks. This thorough check ensures your installation is successful and ready for everyday use.
Initial Water Test for Dishwasher Drainage
The first step in testing is running water through the system. This verifies that the dishwasher can drain effectively into the garbage disposal. It also begins to put pressure on the new connection points. A successful drain cycle is a good sign.
Follow these steps for the initial water test:
- Restore Power: Go back to your breaker box. Flip the circuit breaker for the dishwasher and garbage disposal back to the “ON” position.
- Run a Short Dishwasher Cycle: Start a short wash cycle on your dishwasher. Most dishwashers have a “rinse only” or “light wash” cycle. This is perfect for testing. It fills with water, washes, and then drains.
- Listen for the Disposal: During the drain cycle, you should hear the garbage disposal activate briefly. It sounds like a gurgling noise as the water enters and moves through it. This confirms the water is entering the disposal as intended.
- Observe Dishwasher Drainage: Watch the dishwasher’s interior. The water should drain completely. There should be no standing water left in the bottom of the tub. If water remains, there might still be a blockage or an issue with the high loop.
This initial test confirms the basic functionality of the drain. If the water drains completely, you are on the right track.
Observing for Leaks at the Connection Points
Even if the water drains, leaks can occur at poorly sealed connections. This is why careful observation is crucial. Leaks can start as small drips and become major problems over time. I always use a flashlight for this part. It helps me see small drips that might otherwise go unnoticed.
Perform these checks for leaks:
- Inspect Immediately: As the dishwasher drains, immediately look under the sink. Focus on the area where the dishwasher drain hose connects to the garbage disposal. Look at the hose clamp and the port.
- Feel for Moisture: Run your hand around the entire connection point. Feel for any dampness or drips. Also, check the bottom of the garbage disposal and the main drain pipes for any signs of water.
- Check for Puddles: Look for puddles on the cabinet floor under the sink. Even small drops can indicate a problem.
- Run Another Cycle (Optional): If you are unsure, run another short cycle. This gives more time to observe for leaks. Sometimes, a slow leak takes a minute or two to show.
- Tighten if Necessary: If you find any leaks at the dishwasher hose connection, try tightening the hose clamp a bit more. If the leak persists, you may need to re-seat the hose. Ensure it is pushed fully onto the port.
If no leaks are present after these tests, congratulations! Your dishwasher drain connection is secure and functional. You have successfully completed the installation.
Troubleshooting Common Dishwasher Drain Issues
Even with a perfect installation, sometimes issues can arise later. Dishwashers, like any appliance, can experience problems with their drainage. Understanding common issues helps you address them quickly. It saves you from frustration and potential costly repairs. I always advise homeowners to know basic troubleshooting. It can solve many problems without professional help.
This section covers the most common dishwasher drain issues. We will discuss clogs, backflow, and leaks. Knowing what to look for and how to respond ensures your dishwasher continues to work efficiently.
Clogs and Backups in the Drain Line
Clogs are perhaps the most frequent issue affecting dishwasher drains. Food particles, grease, and soap scum can build up over time. This buildup restricts water flow or blocks it completely. A clogged drain means your dishwasher will not empty. You will find standing water in the bottom of the tub after a cycle.
Here is how to identify and address clogs:
- Symptoms: Standing water in the dishwasher, slow draining, or water backing up into the sink. If your sink also drains slowly, the clog might be further down the main drain line.
- Check the Knockout Plug (Again): If this is a new installation and the dishwasher is not draining at all, double-check that you retrieved the knockout plug from inside the garbage disposal. This is a very common oversight.
- Clear the Air Gap: If you have an air gap on your sink (a small cylindrical device near the faucet), check it. It can become clogged with debris. Remove the cover and clear any blockages.
- Inspect the Drain Hose: Disconnect the drain hose from the disposal and inspect it for blockages. Food particles can sometimes get stuck inside. You can try to clear it with a plumbing snake or by flushing it with water.
- Run the Disposal: If the clog seems to be in the disposal, run it with plenty of cold water. This often clears minor blockages.
- Clear the Main Drain Line: If the sink also backs up, the issue is likely in your main sink drain. You might need to clear your sink P-trap or use a drain cleaner. For more extensive clogs, you might need to clear your dishwasher drain line specifically.
Addressing clogs promptly prevents them from becoming more severe. Regular maintenance can also help prevent them.
Addressing Leaks at the Connection Point
Leaks, even small ones, can cause significant damage over time. Water seeping under your sink can lead to mold, warped cabinets, and structural damage. It is important to address any leaks immediately. A small drip today can become a major flood tomorrow.
Here is how to troubleshoot leaks:
- Identify the Source: First, locate the exact spot where the water is coming from. It could be the hose clamp connection to the disposal, the high loop, or even a crack in the hose itself.
- Tighten the Hose Clamp: The most common cause of leaks at the disposal connection is a loose hose clamp. Use a screwdriver to tighten it firmly. Do not overtighten, as this can damage the hose.
- Re-seat the Hose: If tightening does not work, carefully remove the hose clamp and the drain hose. Ensure the end of the hose is not damaged or cracked. Re-attach the hose, pushing it fully onto the disposal’s inlet port. Then re-tighten the clamp.
- Check for Kinks or Damage: Inspect the entire length of the drain hose for any kinks, punctures, or cracks. A damaged hose will need replacement.
- Verify the High Loop: Ensure the high loop is still properly secured. If it sags, it can cause backflow, leading to standing water in the dishwasher. While not a “leak” per se, it is a related water issue.
- Run a Test Cycle: After any adjustments, run a short dishwasher cycle again. Watch closely for any new or recurring drips.
Promptly addressing leaks protects your home from water damage. Do not delay when you spot a drip.
Maintaining Your Dishwasher and Disposal Drain System
Connecting your dishwasher drain to the garbage disposal is a great step. But maintenance ensures this connection stays efficient for years. Regular care prevents clogs and keeps your appliances running smoothly. This proactive approach saves you time and money on repairs. I always suggest integrating simple maintenance into your routine. It prolongs the life of your appliances.
This section provides practical tips for maintaining your dishwasher and disposal drain. We will cover routine cleaning practices and specific usage tips for your disposal. These habits contribute to a healthy kitchen drainage system.
Regular Cleaning Practices for Dishwasher Drains
Even with a proper connection, food debris and grease can accumulate. Regular cleaning prevents these buildups from becoming clogs. A clean drain system means better performance and fewer issues. I find that consistent small efforts make a big difference.
Consider these cleaning practices:
- Pre-Rinse Dishes (Lightly): While modern dishwashers handle some food particles, scraping large food scraps into the trash before loading prevents many drain issues. Avoid putting large, stringy, or starchy items directly into the dishwasher.
- Clean the Dishwasher Filter: Most dishwashers have a removable filter at the bottom. Check your owner’s manual for instructions. Clean this filter regularly (monthly or bi-monthly) to remove trapped food particles. A clogged filter restricts drainage.
- Run a Hot Cycle with Dishwasher Cleaner: Periodically run an empty dishwasher with a specialized dishwasher cleaner or a cup of white vinegar. This helps break down grease and mineral deposits in the drain lines and internal components.
- Baking Soda and Vinegar Flush: Every few months, sprinkle 1/2 cup of baking soda into the bottom of your dishwasher. Pour 1 cup of white vinegar over it. Let it sit for 15-20 minutes. Then run a hot water rinse cycle. This helps to deodorize and clear minor buildups.
These simple cleaning steps can greatly reduce the chances of clogs. They keep your dishwasher and its drain working well.
Disposal Usage Tips for Optimal Drain Health
Your garbage disposal is part of the dishwasher’s drain path. How you use the disposal directly impacts the overall drain system. Proper disposal use prevents issues like clogs and backflow into your dishwasher. I always emphasize responsible disposal use. It is not a trash can.
Follow these tips for optimal disposal and drain health:
- Use Plenty of Cold Water: Always run cold water before, during, and for at least 30 seconds after grinding food waste. Cold water helps solidify grease, making it easier for the disposal to chop and flush away. Hot water can melt grease, allowing it to stick to pipes and cause clogs.
- Grind Small Batches: Do not overload the disposal. Feed food waste gradually. This allows the disposal to work efficiently and prevents motor strain.
- Avoid Certain Foods: Never put tough, fibrous, or expansive foods down the disposal. This includes celery stalks, potato peels, banana peels, pasta, rice, coffee grounds, and especially grease or cooking oil. These items can easily clog the disposal itself or the drain line further down.
- Run It Regularly: Even if you do not use it for food waste, run your disposal periodically with cold water for a minute. This keeps the parts moving and helps flush out any lingering debris.
- Clean the Disposal: Grind a few ice cubes and a handful of coarse salt. This helps to scour the grinding chamber. Follow it with citrus peels (lemon, lime, orange) for a fresh scent.
By following these maintenance and usage tips, you can ensure your dishwasher drain and garbage disposal work harmoniously. This proactive approach leads to a cleaner kitchen and fewer plumbing headaches. For specific instructions on dealing with standing water, you can also consult guides like how to drain dishwasher water manually.
- dishwasher installation
- garbage disposal drain
- DIY plumbing
- appliance hookup
- kitchen drain
- home improvement

Tessa Winslow
Cleaning Expert
With years of hands-on experience in home care and a love for transforming everyday spaces, I specialize in making cleaning feel approachable and even enjoyable. I share smart, sustainable solutions that blend cleaning, organization, and decor—so your home not only looks good, but feels good too. Whether you're tackling weekend chores or taking on a full DIY refresh, I’m here to help you create a cleaner, cozier space you’ll love coming home to.