· Mason Everett · Home Cleaning · 22 min read
What Is Low Carpet And High Carpet Setting On Vacuum
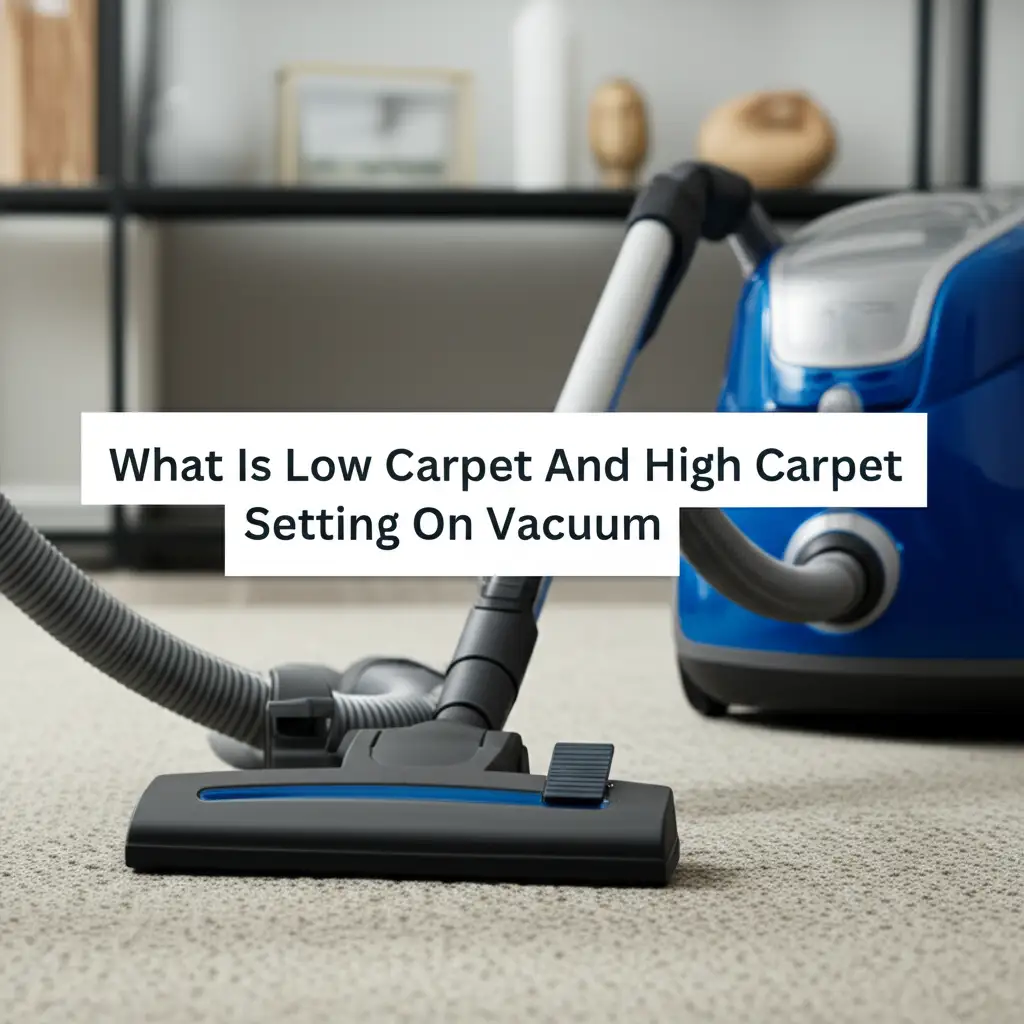
Understanding Your Vacuum’s Carpet Height Settings
Do you ever wonder if you are truly cleaning your carpets well? Many people overlook a small dial or lever on their vacuum cleaner. This control adjusts the distance between the vacuum’s cleaning head and your floor. This adjustment is crucial for effective cleaning. It helps your vacuum perform its best on different carpet types. We will explore what “low carpet” and “high carpet” settings mean. You will learn how to use them for a cleaner home.
Getting the right low carpet and high carpet setting on vacuum is important for proper cleaning. It prevents carpet damage and makes your cleaning efforts more efficient. Using the wrong setting can push dirt deeper into your carpet. It can also cause wear and tear on your vacuum. This guide will help you master these settings. You will gain valuable knowledge for maintaining your carpets. Let’s make sure your vacuum works smarter, not harder, for your home.
Takeaway
- Low Carpet Setting: Use this for thin carpets, low-pile rugs, or bare floors. It brings the brush roll closer to the surface for better agitation and suction.
- High Carpet Setting: Choose this for thick carpets, shag rugs, or high-pile carpets. It raises the brush roll to prevent snagging and allows airflow.
- Adjusting is Key: Always adjust your vacuum’s setting based on your carpet’s pile height. This ensures effective dirt removal and protects your carpet.
- Check Performance: Look for signs like easy pushing, proper suction, and visible dirt removal to confirm the correct setting.
What is low carpet and high carpet setting on vacuum?
The low carpet and high carpet settings on a vacuum adjust the distance between the vacuum’s base and the floor. The low setting lowers the vacuum head closer to the carpet, ideal for short-pile carpets and bare floors. The high setting raises the vacuum head, suitable for thicker, high-pile carpets. This adjustment optimizes suction and brush roll action for different carpet types.
Mastering the Low Carpet Setting for Optimal Cleaning
The low carpet setting is often called the “bare floor” or “short pile” setting. When you choose this option, your vacuum’s cleaning head moves closer to the floor. This means the rotating brush roll, or beater bar, gets very close to the carpet fibers. This close contact is vital for cleaning specific floor types.
This setting works best for low-pile carpets. These carpets have short, dense fibers. Think of office carpets or certain area rugs. The low setting allows the brush roll to agitate these short fibers effectively. This action helps dislodge trapped dirt, dust, and pet hair. Without this close contact, the brush roll might just skim over the surface. It would leave much of the debris behind.
For bare floors, like hardwood, tile, or linoleum, the low setting is also ideal. On bare floors, the brush roll should often be turned off if your vacuum allows it. If it cannot be turned off, using the lowest setting reduces the risk of scattering debris. It also prevents potential scratching of delicate surfaces. The close proximity to the floor ensures maximum suction for picking up crumbs and dust.
Using the low setting on appropriate surfaces leads to a deeper clean. It ensures that the suction power is fully concentrated where it is needed most. This setting also prevents the vacuum from “floating” too high above the surface. A floating vacuum loses suction and cleaning efficiency. Always remember to check your carpet type before selecting this setting.
Benefits of the Low Carpet Setting
Using the low carpet setting provides several advantages for your cleaning routine. First, it offers superior dirt removal for low-pile carpets. The brush roll can deeply agitate the short fibers. This action lifts embedded dirt that a higher setting might miss. You will see less dirt left behind.
Second, it enhances suction power. When the vacuum head sits closer to the surface, it creates a stronger seal. This seal maximizes airflow and suction directly at the point of contact. This results in more efficient pick-up of fine dust, allergens, and pet dander. Your air quality may improve with proper suction.
Third, this setting helps prevent premature wear on your carpets. If you use a setting that is too high on a low-pile carpet, the brush roll might not touch the fibers at all. This means you are only relying on suction. If you use a setting that is too low on a high-pile carpet, it can cause the brush to grind down the fibers. This can damage your carpet over time. The correct low setting protects low-pile carpets. It ensures effective cleaning without excessive friction.
Finally, the low setting makes your vacuum easier to push on the right surfaces. There is less resistance from the carpet. The vacuum glides smoothly, making your cleaning task less tiring. This can significantly improve your cleaning experience. It ensures you get the most out of your vacuum.
Harnessing the High Carpet Setting for Deep Pile Carpets
The high carpet setting is specifically designed for plush, thick carpets and shaggy rugs. These types of carpets have long, dense fibers. You might find them in living rooms or bedrooms, offering a soft, luxurious feel. The high setting raises the vacuum’s cleaning head. This creates more space between the brush roll and the carpet surface.
This increased distance is important for several reasons. First, it prevents the vacuum from getting stuck in thick fibers. A low setting on a high-pile carpet would cause the brush roll to sink too deep. This would make the vacuum very hard to push. It could also stall the motor or damage the brush roll. The high setting allows the vacuum to glide over the long fibers.
Second, raising the vacuum head protects the delicate long fibers. If the brush roll is too close, it can pull, fray, or even tear these fibers. This can lead to visible damage over time. The high setting ensures the brush roll gently agitates the surface. It lifts loose dirt and debris without causing harm. It helps your carpet last longer.
Third, the high setting maintains proper airflow. Thick carpets can block airflow if the vacuum head is too low. This reduces suction efficiency. By creating more space, the high setting allows air to flow freely. This ensures powerful suction can reach deeper into the carpet pile. It helps to extract embedded dirt. For comprehensive cleaning tips, you might want to learn more about how carpet cleaning works.
Benefits of the High Carpet Setting
Using the correct high carpet setting provides significant benefits for your home. It protects your valuable high-pile carpets and ensures effective cleaning. The primary advantage is damage prevention. Thick carpets can suffer from excessive friction if the vacuum head is too low. The high setting prevents the brush roll from getting tangled in long fibers. This stops fiber breakage, matting, or bald spots. Your plush carpets will maintain their soft texture and appearance for longer.
Another key benefit is improved maneuverability. Pushing a vacuum on thick carpet with a low setting is very difficult. It feels like you are pushing a heavy brick. The high setting allows the vacuum to glide more easily. This reduces strain on your body. It makes the cleaning process much faster and more enjoyable. You can clean larger areas without feeling exhausted.
Furthermore, the high setting optimizes deep cleaning for high-pile carpets. While the brush roll is slightly raised, it still works to agitate the fibers. More importantly, it creates enough space for strong airflow. This airflow is crucial for lifting deeply embedded dirt, dust, and pet dander. Without proper airflow, dirt can remain trapped in the lower layers of your carpet. This ensures your vacuum can effectively pull out hidden debris. This is crucial for truly clean carpets.
This setting also extends the life of your vacuum. When a vacuum struggles on too-low settings, its motor works harder. This extra strain can lead to overheating and premature wear on internal components. Using the high setting on appropriate carpets reduces this strain. It helps your vacuum last longer. This saves you money on repairs or replacements. Knowing which cleans better, low or high carpet settings depends entirely on your carpet type.
Why Correct Vacuum Settings Matter for Carpet Care
Using the correct vacuum setting is not just about cleaning. It is about protecting your investment in your carpets. Carpets can be expensive, and proper care extends their lifespan. An incorrect setting can cause invisible damage that adds up over time. This damage leads to premature wear.
When you use a setting that is too low on a high-pile carpet, the brush roll grinds into the fibers. This can flatten the pile. It can also break individual fibers. Over time, your carpet will look matted and worn out. Its soft texture will disappear. This kind of damage is often irreversible.
Conversely, using a setting that is too high on a low-pile carpet reduces cleaning effectiveness. The brush roll may not even touch the carpet. This means it cannot agitate the fibers. Dirt remains trapped. This not only makes your carpet look dirty but can also allow abrasive dirt particles to grind against the fibers. This also causes wear, just in a different way.
Proper settings also improve cleaning efficiency. When the vacuum head is at the right height, the suction is optimized. The brush roll works as intended. This means you pick up more dirt in fewer passes. You save time and energy. Your vacuum also works less strenuously, which extends its own life.
Preventing Carpet Damage
Preventing damage is a major reason to adjust your vacuum settings. Carpets are made of fibers that can be delicate. High-pile carpets, with their long, plush fibers, are especially vulnerable. If your vacuum’s brush roll is too low, it can aggressively pull and tear these fibers. This action leads to matting, fraying, and a loss of the carpet’s original bounce. Over time, you might notice thin or bald spots appearing. This damage makes your carpet look old and worn before its time.
Similarly, low-pile carpets, while more resilient, are not immune. If the vacuum head is too high, the brush roll may not reach the dirt embedded in the fibers. The carpet looks dirty, and unseen grit can act like sandpaper. Each time you walk on it, these particles rub against the fibers, causing microscopic damage. This slow wear dulls the carpet’s appearance and shortens its life.
The correct setting ensures the brush roll gently brushes the fibers. It lifts dirt without tearing or grinding. This gentle yet effective agitation preserves the integrity of your carpet’s pile. It helps your carpet maintain its lush look and feel for years to come. This small adjustment saves you from costly carpet replacement in the future. It is a simple step for long-term carpet health.
Maximizing Cleaning Efficiency
Maximizing cleaning efficiency is another critical benefit of proper vacuum settings. When your vacuum is set correctly, it operates at its peak performance. For a low-pile carpet, the brush roll makes full contact. This maximizes agitation. It dislodges more dirt, dust, and pet hair with each pass. The strong seal created also focuses the suction power. This means more debris is pulled into the vacuum bag or canister. You spend less time vacuuming and get better results.
For high-pile carpets, the correct high setting allows the vacuum to glide smoothly. This prevents it from getting bogged down in the thick fibers. When the vacuum moves easily, you can maintain a consistent pace. This ensures even cleaning across the entire surface. Crucially, the proper height maintains optimal airflow. Without sufficient airflow, even the most powerful vacuum cannot lift deeply embedded dirt. The high setting creates the necessary space for air to flow freely. This allows the powerful suction to work its magic.
Efficient cleaning means you do not have to go over the same spot multiple times. You save energy, both yours and your vacuum’s. This also reduces wear on your vacuum cleaner. The motor does not have to work as hard. Using the right setting ensures every pass counts. It leaves your carpets truly clean and refreshed. This also contributes to the longevity of your home’s carpets.
How to Choose the Best Carpet Setting for Your Floors
Choosing the right vacuum setting is simpler than it seems. Most vacuums have a clear dial or lever on the main body or the vacuum head itself. These controls usually show symbols for different carpet heights. You might see images of short carpet, long carpet, or even a hard floor setting. Some vacuums use numbers, where ‘1’ is often the lowest setting for bare floors, and higher numbers (like ‘4’ or ‘5’) are for thicker carpets.
Start by examining your carpet. Is it short and dense, like an office carpet? Or is it thick and plush, like a shag rug? This visual inspection gives you the first clue. For low-pile carpets, begin with a lower setting. For high-pile carpets, start with a higher setting.
The key is to test the setting. Push your vacuum forward. It should move easily, but you should still feel some resistance. If the vacuum is very hard to push, the setting is too low. The brush roll is digging too much into the carpet. Raise the setting one notch. If the vacuum feels like it is floating or “skipping” over the carpet, the setting is too high. The brush roll is not making enough contact. Lower the setting one notch.
Listen to the vacuum’s sound. A struggling motor indicates the setting is too low for the carpet. A healthy hum means it is working efficiently. You can also visually inspect the carpet after a pass. If you see visible lines from the brush roll without flattening the pile, you are likely at the correct height. A quick check after a vacuuming session will confirm the results. For different types of cleaning, you might even consider how to clean a machine made carpet.
Adjusting Your Vacuum’s Height
Adjusting your vacuum’s height setting is a simple process. Most upright vacuum cleaners have a rotary dial or a sliding lever. This control is usually located on the vacuum’s powerhead or at the base near the wheels. For canister vacuums or stick vacuums, the adjustment might be on the power nozzle attachment itself.
To adjust, first, turn off your vacuum. This is a safety step. Then, locate the height adjustment control. It often has symbols like small carpet, large carpet, or a bare floor icon. Some models use numbers, with ‘1’ typically representing the lowest setting for bare floors and higher numbers for thicker carpets.
If you are vacuuming a short-pile carpet or a bare floor, select a low setting. This brings the brush roll closer to the surface. For thick, plush, or shag carpets, choose a higher setting. This lifts the brush roll away from the deep pile. The goal is to allow the brush roll to agitate the carpet fibers without getting bogged down or causing excessive friction.
After adjusting, turn your vacuum back on and make a test pass. Observe how easily the vacuum moves. It should glide with a slight resistance, not feel like it’s sticking or floating. Listen to the motor sound. A steady hum means the setting is likely correct. A strained or high-pitched sound might indicate the brush roll is struggling, suggesting you need to adjust higher. Proper adjustment makes cleaning more effective and easier for you.
Common Mistakes to Avoid
When it comes to vacuuming, several common mistakes relate to carpet settings. Knowing these pitfalls helps you avoid them. First, many people use a single setting for all their carpets and floors. This is the most frequent error. Your living room shag rug needs a different setting than your kitchen runner or hardwood floor. Failing to adjust means either poor cleaning or potential damage.
Second, not testing the setting is another common mistake. It is easy to assume you picked the right height. However, a quick test pass reveals if the vacuum is too hard to push or if it is floating. Always do a small test section. Feel the resistance. Observe the vacuum’s movement. This simple step can save you frustration and ensure better results.
Third, ignoring signs of damage or struggle. If your vacuum sounds like it is straining, or if you see visible lines of flattened carpet, the setting is wrong. Continuing to vacuum despite these signs can damage both your carpet and your vacuum. Listen to your machine. Look at your carpet. These are clear indicators.
Finally, some people mistakenly believe that the lowest setting always means the best clean. This is not true for all carpet types. While a low setting is great for low-pile carpets, it can harm high-pile ones. It can also make vacuuming very difficult. The best clean comes from the correct setting for the specific carpet, not necessarily the lowest one. Avoiding these mistakes ensures efficient and safe cleaning.
Beyond Settings: Enhancing Your Carpet Vacuuming Results
While adjusting your vacuum’s carpet setting is crucial, other factors also play a big role. These elements work together to ensure your carpets are as clean as possible. Thinking beyond just the height setting can greatly improve your cleaning routine. Consider the type of brush roll, the power of your vacuum’s suction, and regular maintenance.
The brush roll, also known as the beater bar, is a key component. It has bristles that agitate the carpet fibers. This action helps to loosen dirt, dust, and pet hair. Without an effective brush roll, much of the deeply embedded debris would remain. Make sure your brush roll is clean and free of tangled hair. A clogged brush roll cannot do its job properly.
Suction power is another vital element. This is the vacuum’s ability to pull air and debris into its collection bag or canister. Even with the perfect carpet setting, weak suction will leave dirt behind. Factors like a full dirt bag, clogged filters, or leaks in the hose can reduce suction. Regular checks are important.
Finally, regular vacuum maintenance ensures all components work together. Cleaning filters, emptying dustbins, and checking hoses prevent clogs. These simple steps keep your vacuum running efficiently. A well-maintained vacuum provides the best cleaning performance. Combining proper settings with these other factors leads to truly clean carpets. You can even explore different methods like can you dry clean a carpet for specific cleaning needs.
The Role of the Brush Roll
The brush roll, or beater bar, is a central part of your vacuum cleaner’s effectiveness. This rotating cylinder, typically located in the vacuum head, is fitted with rows of bristles. Its primary function is to agitate the carpet fibers. As it spins, the bristles flick and loosen dirt, dust, and pet hair that are embedded deep within the carpet pile. This action is crucial because suction alone often cannot remove all trapped debris.
The type of brush roll matters. Some vacuums have brush rolls with stiffer bristles, designed for more aggressive agitation on durable carpets. Others feature softer bristles or even beater bars without bristles, which are better for delicate rugs or bare floors. The effectiveness of the brush roll is directly tied to the carpet setting. If the setting is too high, the bristles may not touch the carpet at all. If it is too low, the bristles might push too hard, potentially damaging the carpet or tangling in long fibers.
It is vital to keep your brush roll clean. Hair, threads, and other debris can wrap around the brush roll. This reduces its ability to spin freely and agitate the carpet. A clogged brush roll can also put extra strain on the vacuum’s motor. Regularly inspecting and cleaning the brush roll ensures it can perform its job efficiently. This simple maintenance step greatly contributes to your vacuum’s overall cleaning power.
Understanding Suction Power
Suction power is the force that pulls dirt and debris into your vacuum cleaner. It is a critical factor for effective cleaning, working hand-in-hand with the brush roll and carpet settings. High suction power means your vacuum can lift more particles, including fine dust, allergens, and pet dander, from deep within the carpet pile. Without adequate suction, even the most aggressive brush roll cannot effectively remove loosened dirt.
Several factors influence a vacuum’s suction power. The motor’s strength plays a big part. A more powerful motor generally creates stronger suction. However, airflow is just as important. Suction works by creating a strong airflow current. Any blockage in this current will reduce power.
Common culprits for reduced suction include:
- Full Dirt Bag or Canister: A full bag or container restricts airflow, causing suction to drop significantly.
- Clogged Filters: Dirty filters prevent air from passing through freely. Regularly cleaning or replacing filters is essential.
- Blocked Hoses or Attachments: Debris can get stuck in the vacuum hose or attachments. Check these areas for clogs.
- Poor Seal: If the vacuum head does not create a good seal with the floor, air escapes, reducing suction. This is where the correct carpet setting becomes vital.
Understanding suction power helps you troubleshoot cleaning issues. If your vacuum is not picking up dirt well, check these common areas. Proper maintenance ensures your vacuum maintains its full suction capability, providing a deep and thorough clean for your carpets.
Maintaining Your Vacuum for Peak Performance
Regular vacuum maintenance extends the life of your machine and keeps it working efficiently. Just like any appliance, your vacuum needs some care to perform its best. Taking a few simple steps consistently can make a big difference. These steps include emptying the dustbin, cleaning or replacing filters, and checking the brush roll.
First, always empty your vacuum’s dustbin or change the bag when it is full. A full dustbin reduces suction power significantly. It makes your vacuum work harder and clean less effectively. Some vacuums have indicators that tell you when to empty them. Pay attention to these signals.
Second, filters are crucial for maintaining air quality and suction. Most vacuums have at least one filter, sometimes more. Check your vacuum’s manual for specific filter cleaning instructions. Some filters are washable, while others need to be replaced periodically. Dirty filters restrict airflow, leading to poor performance. Cleaning them regularly ensures strong suction.
Third, inspect the brush roll often. Hair, string, and other debris can get wrapped around it. This prevents the brush roll from spinning properly. It reduces its ability to agitate carpets. Carefully cut away any tangled material using scissors. Ensure the bristles are not worn down. A worn brush roll may need replacement.
Finally, check the hose and attachments for blockages. Sometimes, larger pieces of debris can get stuck, reducing suction. Use a broom handle or a long stick to dislodge anything you find. Performing these simple maintenance tasks ensures your vacuum provides a deep, thorough clean every time. This routine helps your machine last longer, too.
Filter Cleaning and Replacement
Filters are the unsung heroes of your vacuum cleaner. They capture fine dust, allergens, and other microscopic particles. These particles would otherwise be released back into your home’s air. Clean filters are essential for strong suction and good air quality. If your vacuum seems to be losing suction, dirty filters are often the first place to look.
Most vacuums have at least one primary filter, often located near the dustbin. Some models, especially those designed for allergy sufferers, also have HEPA filters. These filters capture even smaller particles. Always consult your vacuum’s user manual for specific instructions on filter maintenance.
There are generally two types of filters: washable and disposable.
- Washable Filters: These filters can be rinsed under cool water until the water runs clear. Allow them to air dry completely for at least 24 hours before putting them back into the vacuum. Placing a damp filter back in can damage the motor or promote mold growth.
- Disposable Filters: These filters cannot be washed and must be replaced periodically. The manual will specify how often. Keep spare filters on hand so you can replace them when needed.
The frequency of filter cleaning or replacement depends on how often you vacuum and how much dirt you pick up. If you have pets or a large family, you may need to clean or replace filters more frequently. Neglecting filter maintenance reduces your vacuum’s effectiveness. It also pushes dust back into your home. A simple filter check and clean can dramatically improve your vacuum’s performance.
Brush Roll Maintenance
The brush roll is the heart of your vacuum’s carpet cleaning ability. Its bristles agitate the carpet fibers, loosening embedded dirt. Proper maintenance of the brush roll ensures it works efficiently. Over time, hair, string, and other debris can get tangled around the brush roll. This prevents it from spinning freely. A restricted brush roll cannot agitate the carpet effectively, reducing your vacuum’s cleaning power.
To maintain your brush roll, you should:
- Turn Off and Unplug: Always turn off and unplug your vacuum before performing any maintenance. This prevents accidental startup and injury.
- Access the Brush Roll: On most upright vacuums, you can simply flip the vacuum over to access the brush roll. Some models may require removing a cover plate, often held by screws or clips.
- Remove Tangled Debris: Carefully use a pair of scissors or a seam ripper to cut away any hair or threads wrapped around the brush roll. Be careful not to cut the bristles or the belt that drives the brush roll.
- Check for Wear: Inspect the bristles. If they are matted, bent, or severely worn down, the brush roll may need to be replaced. Worn bristles cannot agitate carpets effectively.
- Inspect the Belt: The brush roll is usually driven by a belt. Check if the belt is stretched, cracked, or broken. A damaged belt means the brush roll will not spin. Belts can be replaced relatively easily on most models.
Performing brush roll maintenance regularly, especially
- vacuum settings
- carpet care
- vacuum cleaner
- floor cleaning

Mason Everett
Senior Writer
With a deep-rooted love for hands-on projects and over a decade in DIY home solutions, I focus on making home improvement accessible for everyone. At Cosy Home Creation, I share tried-and-true tips for enhancing your space—whether you're remodeling a room, upgrading your storage, or just making things a little more functional. My goal is simple, help you build a home that feels good to live in, one practical project at a time.