· Elira Thomsen · Home Cleaning · 14 min read
How To Clean Onyx Showers
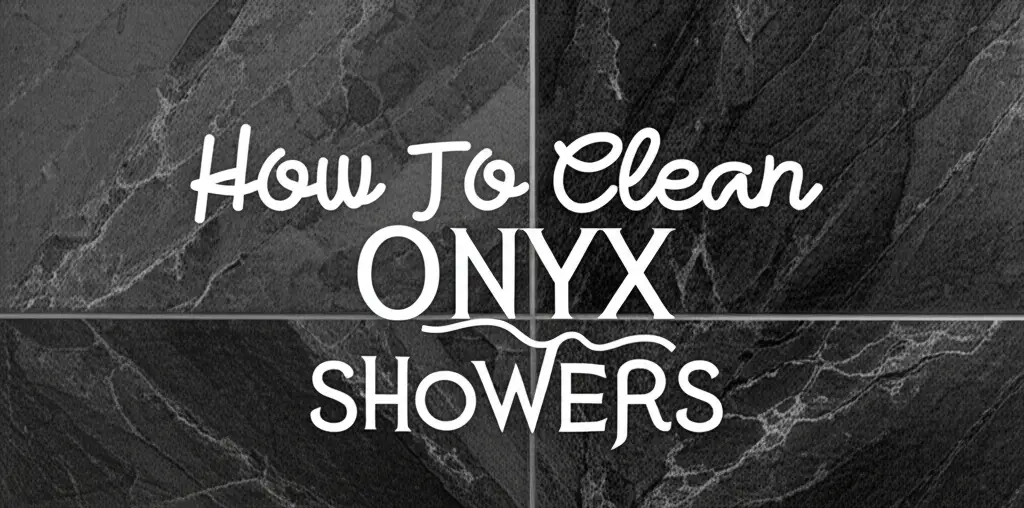
How To Clean Onyx Showers
Cleaning onyx showers correctly is crucial for maintaining their beauty. Onyx is a stunning natural stone, but it needs specific care. Using the wrong products can damage its surface. This article guides you through safe and effective cleaning methods.
Introduction
Onyx showers bring elegance and luxury to any bathroom space. Their unique veining and translucent qualities make them a true centerpiece. However, this beautiful natural stone is also delicate. It is porous and reacts poorly to harsh chemicals and abrasive tools. This means regular, gentle cleaning is essential to preserve its shine and prevent damage.
Learning how to clean onyx showers properly ensures their longevity. It protects your investment and keeps your bathroom looking pristine. We will cover understanding onyx properties, gathering the right supplies, daily and weekly cleaning routines, tackling common stains, and the importance of sealing. We will also discuss what cleaning agents to avoid. By following these steps, you can keep your onyx shower looking magnificent for many years.
Takeaway
- Always use pH-neutral cleaners specifically designed for natural stone.
- Wipe down your onyx shower surfaces daily after each use.
- Seal your onyx regularly to protect it from stains and moisture.
- Avoid acidic or abrasive cleaning products at all costs.
How to clean onyx showers?
To clean onyx showers, use a pH-neutral, non-abrasive cleaner. Mix it with water as directed, apply with a soft cloth or sponge, and rinse thoroughly. Avoid harsh chemicals like vinegar or bleach, which can etch the stone. Regular sealing also helps protect the surface.
Understanding Onyx: A Guide to Its Unique Properties
Onyx is a beautiful form of calcite, a type of calcium carbonate. It forms from mineral deposits in natural springs. This unique formation gives onyx its characteristic translucent appearance and beautiful banding. However, its composition also makes it quite delicate.
Unlike granite or quartz, onyx is a softer and more porous stone. It is very sensitive to acids. Even mild acids, like those found in lemon juice or vinegar, can cause etching. Etching means the stone’s surface loses its polish and develops dull spots. Its porous nature also means it can absorb liquids easily. This makes it more prone to staining if spills are not cleaned quickly. Understanding these properties helps you approach how to clean onyx showers with the right mindset.
Proper care preserves the stone’s natural luster and integrity. Ignoring its sensitivities leads to permanent damage. This guide will focus on cleaning methods that respect onyx’s unique nature. It ensures your shower remains a stunning feature.
Essential Supplies for Cleaning Onyx Showers
Gathering the correct cleaning supplies is the first step in protecting your onyx shower. Using the wrong products can cause irreversible damage. Your primary cleaning agent should always be a pH-neutral stone cleaner. These cleaners are specially formulated to be safe for natural stone surfaces. They effectively remove dirt and grime without harming the stone.
For light cleaning, you can also use a few drops of mild, pH-neutral dish soap mixed with warm water. Always choose dish soap without harsh degreasers or strong perfumes. Avoid any cleaners containing acids like vinegar or lemon, or harsh chemicals such as bleach or ammonia. These substances will etch and dull the onyx surface. Never use abrasive cleaners like scouring powders or cream cleansers.
You will also need soft cleaning tools. Microfiber cloths are excellent for wiping and polishing. Non-abrasive sponges are good for gentle scrubbing. A spray bottle helps apply cleaners evenly. Keep a squeegee handy for daily water removal. Using only these gentle tools and cleaners prevents scratches and maintains the beauty of your onyx. Always read product labels carefully before use to confirm they are safe for natural stone.
Step-by-Step Daily and Weekly Onyx Shower Cleaning
Maintaining your onyx shower involves both daily attention and a weekly deep clean. This dual approach ensures your shower stays sparkling and protected. Consistent care prevents the buildup of soap scum and hard water stains, making the cleaning process easier.
Daily Care for Onyx Showers
After every shower, take a few minutes to complete a quick clean. First, use a squeegee on all onyx surfaces, including walls and doors. This removes excess water, which is the main cause of hard water spots. Next, wipe down all surfaces with a clean, soft microfiber cloth. This step removes any remaining moisture.
Ensure good ventilation in your bathroom. Open a window or turn on the exhaust fan. Proper airflow helps dry the surfaces faster and reduces humidity. This prevents mildew growth. Daily wiping greatly reduces the need for heavy scrubbing later on. It keeps your onyx looking new without much effort.
Weekly Deep Clean for Onyx Showers
Once a week, perform a more thorough cleaning of your onyx shower. Start by removing all bottles and items from the shower area. Mix your pH-neutral stone cleaner with water according to the product’s instructions. Pour the solution into a spray bottle for easy application. Spray the entire onyx surface, including walls, floor, and any benches.
Allow the cleaner to sit for a few minutes, as recommended by the product. Do not let it dry on the stone. Use a soft cloth or non-abrasive sponge to gently wipe down all surfaces. For areas with light buildup, a bit more gentle pressure can be applied. Rinse the entire shower thoroughly with clean, warm water. Make sure to remove all cleaner residue. Finally, dry all onyx surfaces completely with a clean, dry microfiber cloth. This prevents new water spots from forming.
Tackling Common Stains on Onyx Showers
Even with regular cleaning, some common stains might appear on your onyx shower. Soap scum, hard water spots, and mildew are common culprits. Each requires a specific, gentle approach to remove without damaging the delicate stone. Always test any stain removal method on an inconspicuous area first. This precaution ensures the method is safe for your specific onyx.
Removing Soap Scum
Soap scum forms from the minerals in water reacting with soap. It leaves a dull, hazy film on your onyx. To remove it safely, create a thick paste, also known as a poultice. Mix a small amount of baking soda or unbleached flour with your pH-neutral stone cleaner. The paste should have the consistency of peanut butter. Apply this paste generously over the soap scum. Cover the area with plastic wrap to keep the paste moist. Secure the plastic wrap with painter’s tape.
Allow the poultice to sit for several hours, or even overnight, to draw out the stain. The longer it sits, the more effective it can be. After the dwelling time, gently remove the paste with a soft plastic scraper or wooden utensil. Wipe the area clean with a soft, damp cloth. Rinse thoroughly with clean water and dry the onyx surface completely. This method lifts the soap scum without scrubbing.
Eliminating Hard Water Stains
Hard water contains minerals like calcium and magnesium, which leave white, crusty deposits. These stains can be tricky on onyx because most commercial hard water removers are acidic. Do not use standard hard water removers. Instead, look for a specialized stone-safe hard water stain remover. These products are formulated to be pH-neutral.
Apply the stone-safe remover according to the manufacturer’s instructions. Usually, this involves spraying or dabbing it onto the stain. Let it sit for the recommended time. Then, gently wipe the area with a soft, non-abrasive sponge or cloth. For stubborn spots, a second application might be needed. Always rinse the area thoroughly with clean water afterward. Dry the onyx completely to prevent new stains from forming. Regular squeegeeing helps prevent these stains from building up.
Addressing Mildew
Mildew is a type of fungus that thrives in damp, warm environments. It often appears as black or gray spots. For mildew on onyx, a very mild solution of hydrogen peroxide is often effective. Use a 3% hydrogen peroxide solution, which is commonly found in drugstores. Test it in a small, hidden area first to ensure it does not affect your onyx color.
Lightly spray the diluted hydrogen peroxide directly onto the mildew spots. Allow it to sit for about 10-15 minutes. The hydrogen peroxide will work to break down the mildew. After the dwell time, gently wipe the area with a soft cloth or sponge. Rinse the onyx surface thoroughly with clean water. Ensure all residue is removed. Proper ventilation is key to preventing mildew from returning. Keep your bathroom well-aired and dry after each shower.
Sealing Onyx for Long-Term Protection
Sealing your onyx shower is a vital step in its maintenance. Onyx is naturally porous, meaning it has tiny openings that can absorb liquids. This makes it vulnerable to staining and etching from various substances. A stone sealer creates an invisible barrier on the surface of the onyx. This barrier does not make the stone waterproof but significantly reduces its absorption rate.
Applying a good quality stone sealer helps protect your onyx from spills and moisture. It gives you more time to clean up accidents before they penetrate the stone and cause permanent stains. Sealing also offers some protection against etching from accidental contact with acidic substances. While it doesn’t make onyx impervious to acids, it provides a crucial first line of defense. The frequency of sealing depends on the sealer type and how much your shower is used. Typically, onyx showers need to be sealed every one to three years. Always follow the specific instructions on your chosen sealer product.
Steps for Sealing Onyx:
- Clean Thoroughly: Before sealing, ensure your onyx shower is perfectly clean and completely dry. Any dirt or moisture trapped under the sealer will become a permanent part of the surface.
- Apply Sealer Evenly: Use a clean, lint-free cloth or an applicator pad to apply the sealer. Work in small sections, applying a thin, even coat. Do not allow the sealer to puddle on the surface.
- Allow Dwell Time: Let the sealer sit on the surface for the time recommended by the manufacturer. This allows the stone to absorb the sealer. It’s usually a few minutes.
- Wipe Off Excess: After the dwell time, use a clean, dry cloth to wipe off any excess sealer from the surface. Do not let excess sealer dry on the stone, as it can leave a hazy residue.
- Cure Time: Allow the sealer to cure for the recommended period, often 24-72 hours. Avoid using the shower during this time. This ensures the sealer fully bonds with the stone, providing maximum protection.
What to Avoid When Cleaning Onyx
Knowing what to avoid is as important as knowing what to use when cleaning onyx showers. Using the wrong products or methods can lead to costly and irreversible damage. Onyx is a delicate natural stone, and certain substances are highly detrimental to its surface. Understanding these pitfalls will help you protect your beautiful shower.
First and foremost, never use acidic cleaners on onyx. This includes common household products like vinegar, lemon juice, or cleaners containing citric acid. Even mild acids can react with the calcium carbonate in onyx. This reaction causes etching, which appears as dull spots or rough patches where the polish has been removed. Once etched, the surface can be difficult and expensive to repair. Similarly, avoid strong chemical cleaners like bleach or ammonia-based products. These can damage the sealer on your onyx and even discolor the stone over time.
Secondly, stay away from abrasive cleaning tools and cleaners. Scouring powders, steel wool pads, stiff brushes, or gritty cream cleansers will scratch the soft surface of the onyx. These scratches trap dirt and dull the stone’s natural shine. Always opt for soft cloths, microfiber towels, and non-abrasive sponges. Thirdly, be cautious with high heat. While hot water is fine, avoid using steam cleaners directly on onyx. The intense heat can potentially damage the sealer or force moisture and impurities deeper into the porous stone. Stick to manual cleaning methods for safety. By avoiding these harmful substances and tools, you prevent damage and maintain the inherent beauty of your onyx shower for years to come.
Maintaining the Luster of Your Onyx Shower
Maintaining the beautiful luster of your onyx shower is an ongoing process. It extends beyond just cleaning and includes proactive measures to preserve its shine. The key lies in consistency and attention to detail. A well-maintained onyx shower retains its luxurious appearance, adding lasting value to your home.
Your daily cleaning routine is the most important step for maintaining luster. Regularly squeegeeing and wiping down surfaces prevents water spots and mineral buildup. These buildups can dull the stone’s natural sheen over time. Promptly addressing any spills or splatters is also crucial. Onyx is porous, so liquids left on the surface can penetrate and cause stains. Clean up any soap, shampoo, or cosmetic spills immediately to prevent permanent marks.
Ensuring proper ventilation in your bathroom also contributes to maintaining luster. A dry environment discourages mildew growth and reduces humidity, which can affect the stone. Keep your exhaust fan running during and after showers, or open a window. Periodically inspecting your onyx for any new issues like small etches or dull spots allows for early intervention. If you notice any significant dullness or persistent stains, consider reapplying a quality stone polish designed for onyx or natural stone. However, polish does not replace sealing. Reapplying sealer as needed, typically every few years, ensures the protective barrier remains intact. This proactive approach helps your onyx shower retain its dazzling, natural beauty for a lifetime.
FAQ Section
Can I use vinegar on onyx showers? No, you should never use vinegar on onyx showers. Vinegar is acidic and will react with the calcium carbonate in the onyx. This reaction causes etching, which leaves permanent dull spots or rough areas on the stone’s surface. Always use pH-neutral cleaners designed for natural stone.
How often should I clean my onyx shower? For daily maintenance, squeegee and wipe down your onyx shower after every use. This prevents water spots. Perform a more thorough cleaning with a pH-neutral cleaner weekly to remove light soap scum and dirt. This routine helps preserve the stone’s beauty.
What is the best cleaner for onyx showers? The best cleaner for onyx showers is a pH-neutral cleaner specifically formulated for natural stone. These cleaners are gentle and effectively clean without damaging the stone’s surface or compromising its seal. Mild dish soap diluted in water can also be used for light cleaning.
How do I remove hard water stains from onyx? To remove hard water stains from onyx, use a stone-safe hard water stain remover or a gentle poultice. Standard hard water removers are acidic and will etch the stone. Apply the specialized cleaner as directed, gently wipe, then rinse thoroughly to avoid damage.
Does onyx need to be sealed? Yes, onyx absolutely needs to be sealed regularly. Onyx is a porous stone, and sealing creates a protective barrier on its surface. This barrier helps prevent water, soap, and other substances from penetrating the stone, significantly reducing the risk of stains and etching.
Can I use a steam cleaner on onyx? It is generally not recommended to use a steam cleaner on onyx. The intense heat from steam can potentially damage the stone’s sealer. Steam can also force moisture and impurities deeper into the porous onyx, which could lead to internal damage or discoloration. Stick to gentle manual cleaning.
Conclusion
Cleaning onyx showers correctly is an act of care that preserves their stunning beauty. We have discussed that onyx, a delicate natural stone, demands a gentle touch. Using pH-neutral cleaners and soft tools is not just a preference; it is a necessity to avoid etching and scratches. Daily wiping and regular, gentle cleaning routines prevent the buildup of unsightly soap scum and hard water stains.
Remember that sealing your onyx shower is crucial for its long-term protection, acting as an invisible shield against potential damage. Knowing what to avoid, such as harsh acids and abrasive materials, is equally important. By following these comprehensive guidelines, you will ensure your onyx shower remains a luxurious and durable centerpiece in your bathroom for years to come. Embrace these simple yet effective practices, and continue to enjoy the elegance of your meticulously maintained onyx.
- onyx shower cleaning
- stone shower maintenance
- natural stone cleaning
- bathroom cleaning tips
- hard water stains onyx


